How to build your forms in the form builder
Let's have a quick look on the principles of our form builder, how to add the desired content (like question blocks, welcome and closing messages) and how to add some smartness to it all.

Concept of the form builder
As you may have noticed, our form builder is a bit different from traditional form builders. Let us explain some principles of our form builder.
Storyboard
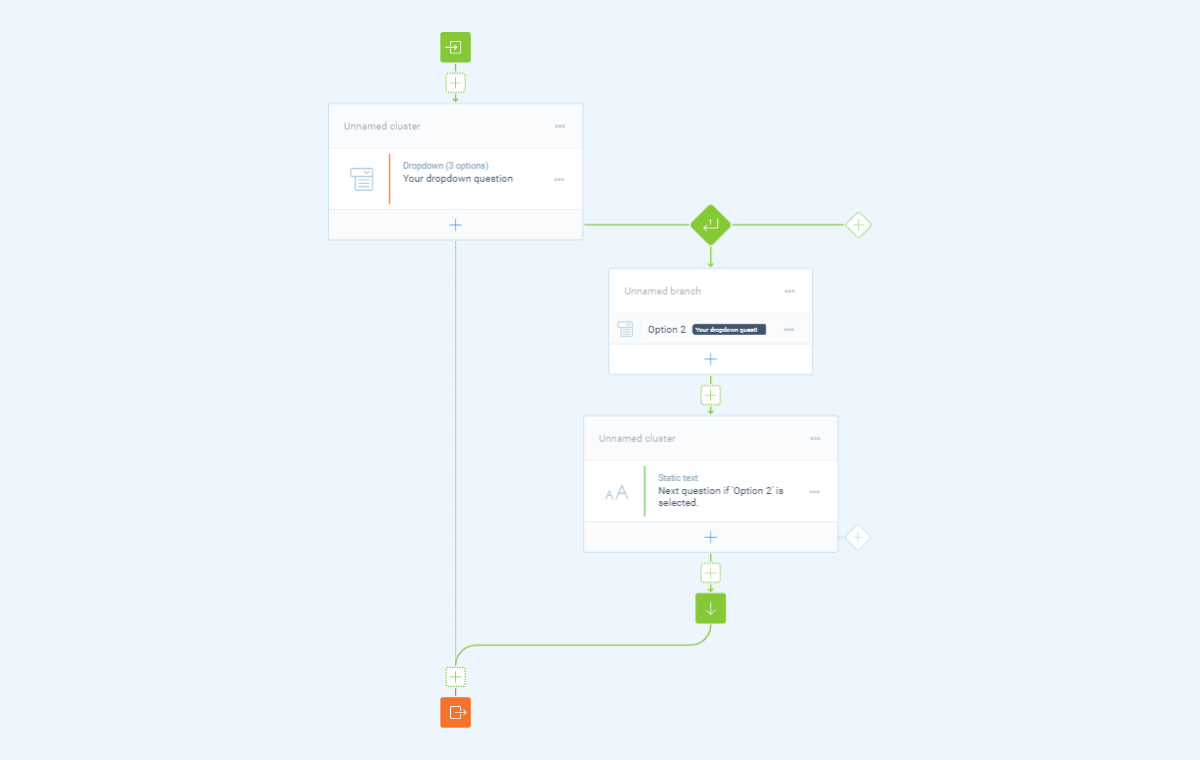
The form builder is intended to build smart forms. Smart forms need logic and that's what the form builder helps you with: it shows a visual presentation of the flows in your forms on a storyboard.
- The top-down direction shows the order of the form blocks inside the form;
- The left-right direction shows decisions inside the form that can be taken depending on the input of your respondents. We call those decisions branches.
Autosave
Everything you do in the form builder gets saved immediately (autosave), so you don't have to worry about saving your form project yourself. It's done automatically all the time.
Gestures
The form builder works with some smart gestures to navigate through the storyboard and to drag-and-drop items on the storyboard. Please have a look at the video tutorial below or at this article to learn how to control the form builder: Learn the basic controls to use the form builder.
Form structure
When you start a new form in the form builder, all you see is a green and a red bubble, indicating the start and end of your form. In between these bubbles, we're going to build our form structure.
Start
The green bubble with the icon indicates the start of your form. You can click it to insert a welcome message that is shown to your respondents before the actual form starts.
End
The red bubble with the icon indicates the default ending of your form. You can click it to insert a closing message to your form that is shown when your respondents completed the form.
It's also possible to insert different closing messages based on your respondent's answers. You use form logic for that, which we'll discuss later in this article.
Sections
All form blocks are placed within sections. Sections are the containers for the questions you're asking/actions you're performing. You can use sections to add logic and create cuts inside your form.
Subforms
Next to sections, it's also possible to use so-called subforms to create forms-in-forms for improved organization and structuring of large forms. With a subform you can bundle a part of your form into one block in your form structure. That way you can make your form structure a lot smaller on the storyboard and therefore easier to oversee.
Form content
The actual content of your form gets determined by the form blocks you add in the form builder. After you added a form block you can select the desired block type. We offer two types of blocks:
Question blocks
Question blocks can be used to let your respondents interact with your form. For each question block you can select the question type. The question type takes care of the input control that is associated with each block. Have a look at this article for a guide on determing the right question type for your questions.
Examples of question types are text (single and multiple line), multiple choice, picture choice, checkboxes, radio buttons, date, matrix, file upload, etc.;
Action blocks
Action blocks, just like question blocks, can be used anywhere in the form, but instead of providing a certain input, it performs a certain action.
Examples of actions are performing a calculation, sending an email or prefilling a value in a question.
You can see an overview of all question and action blocks Tripetto offers via the following link:
Block features
When you have selected the desired block type, you can enter the content/settings for that block. On the left of the block pane, you'll see a list of block features. These are switches you can toggle to add content and settings to each form block.
Common block features
Most of these block features are available for all question types, for example:
Text- The main text of the form block;Description- An optional description of the form block;Help text- An optional help text of the form block;Required- An option to determine if the question is required to fill out by the respondents;Visibility- An option to determine if the block is visible in the form;Alias- An option to set an alias to use in the dataset (more information on alias over here);Exportability- An option to determine if the collected data gets saved (more information on the exportability over here).
Discover all form blocks
We made dedicated help articles for each block type we offer. Select one from the list below to see full details about that block type.
Discover our form blocks
How to use the...Form logic
To create the necessary logic for smart forms, you use so called branch logic. Such branches are drawn in the vertical direction, making it visual to you which paths can be taken in your form.
Branch logic
By adding the desired branch conditions and branch behavior to each branch, you determine what condition(s) must be matched to enter a certain branch in the form. Branches are very powerful and you can read all about it in this article.
Underneath each branch you can fill in the follow-up, containing the form blocks and/or logic that respondents get to see when they have entered a certain branch in the form.
Branch endings
At the end of each branch you can select how the form should proceed after that branch is completed by your respondents. You can choose from different types of branch endings, for example jump to a later part of your form, or a custom closing message.
You can see an overview of all logic types Tripetto offers via the following link:
Video tutorials
We also made some video tutorials about how to use the storyboard of Tripetto.
More video tutorials
You can have a look at all our help articles for more in-depth (video) tutorials to get the most out of Tripetto. Or have a look at our YouTube channel for all videos.