How to get your results from the WordPress plugin
Learn how you can manage and export your results to CSV so you can use your data for example in Excel or Google Sheets.

Manage results
Inside the WordPress plugin you can see and manage all results of each form. From the list of your forms (also see this article) you can click Results by moving your cursor over each row in the list.
You can also click Results at the top menu of the form builder while editing a certain form.
View results
This will show a list of all results you received for the selected form.
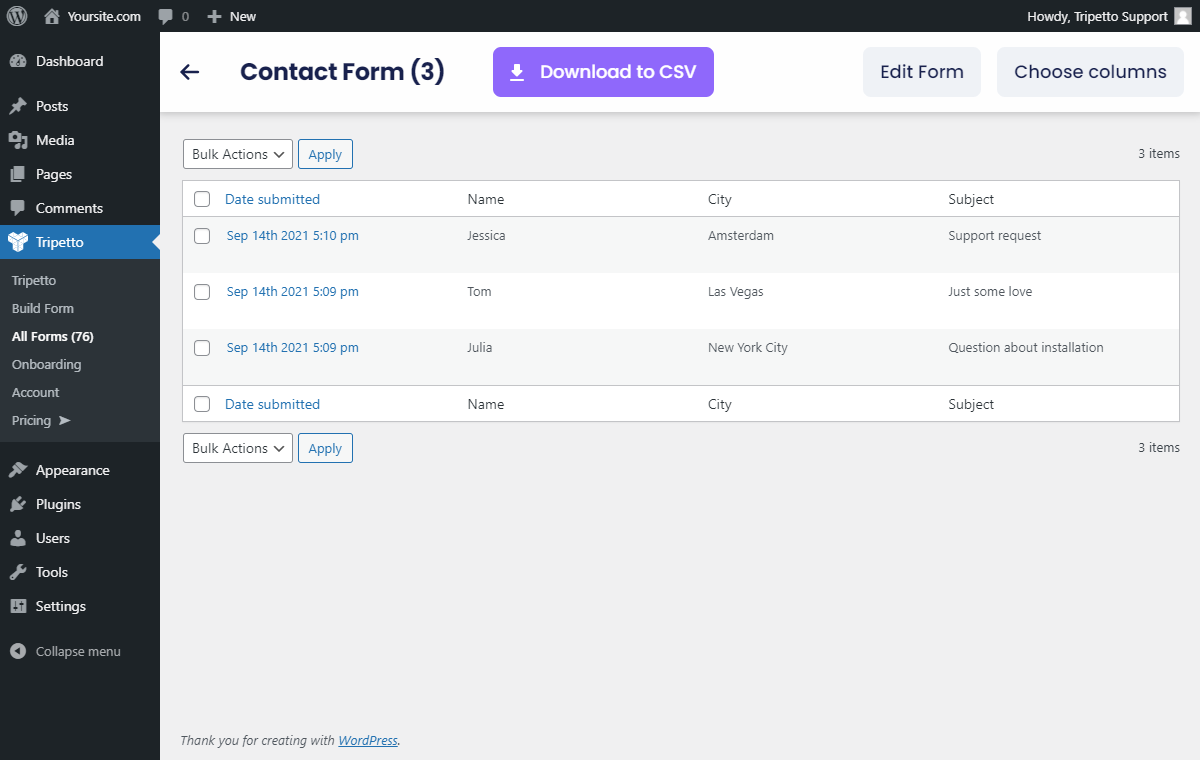
Column selection
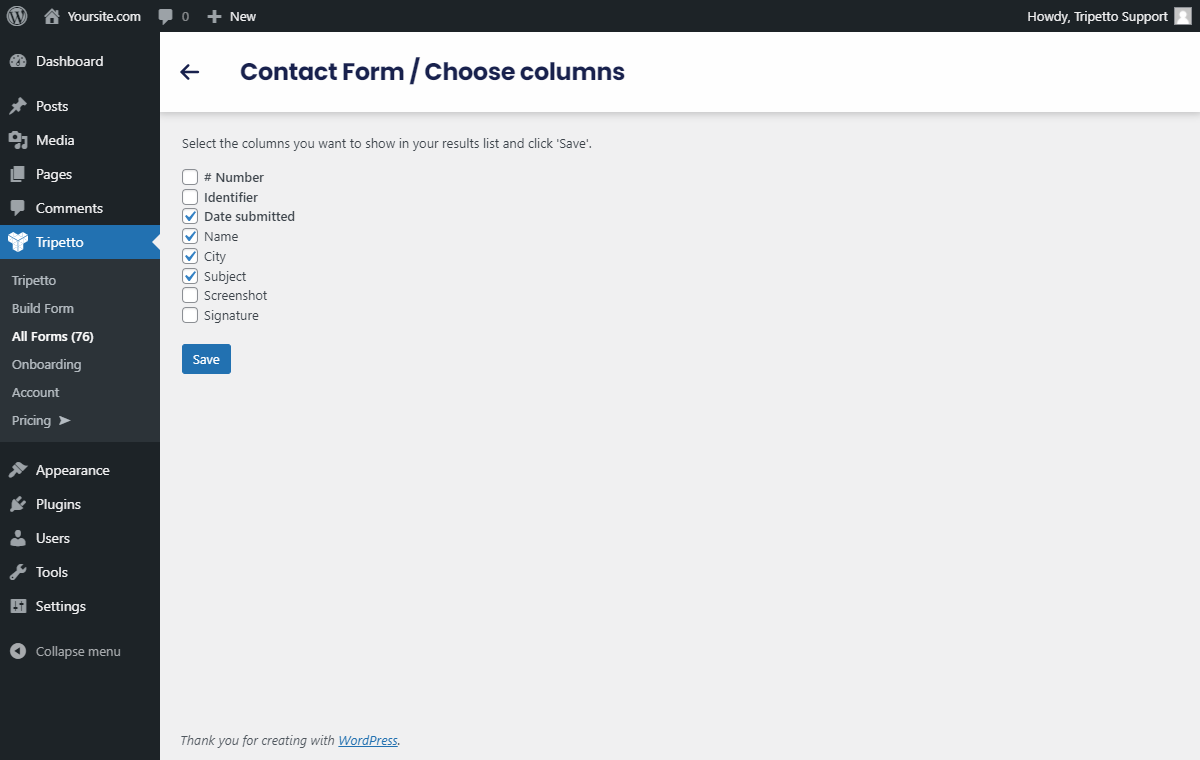
By default this list will only contain some basic columns with meta data of each result (Number/Identifier/Date submitted). To make the list of results more useful, you can customize the columns and show actual data from your form in that list.
To do so, click Choose columns at the top right corner of the results list. This option will become available when you have at least one result in your results list.
From there on you can select which columns you want to show in the results list:
- Basic meta data: you can select which meta data columns you want to show (Number/Identifier/Date submitted);
- Submission data: you can select which question block(s) from your form you want to show. This way you can for example show the name of each respondent in the results list.
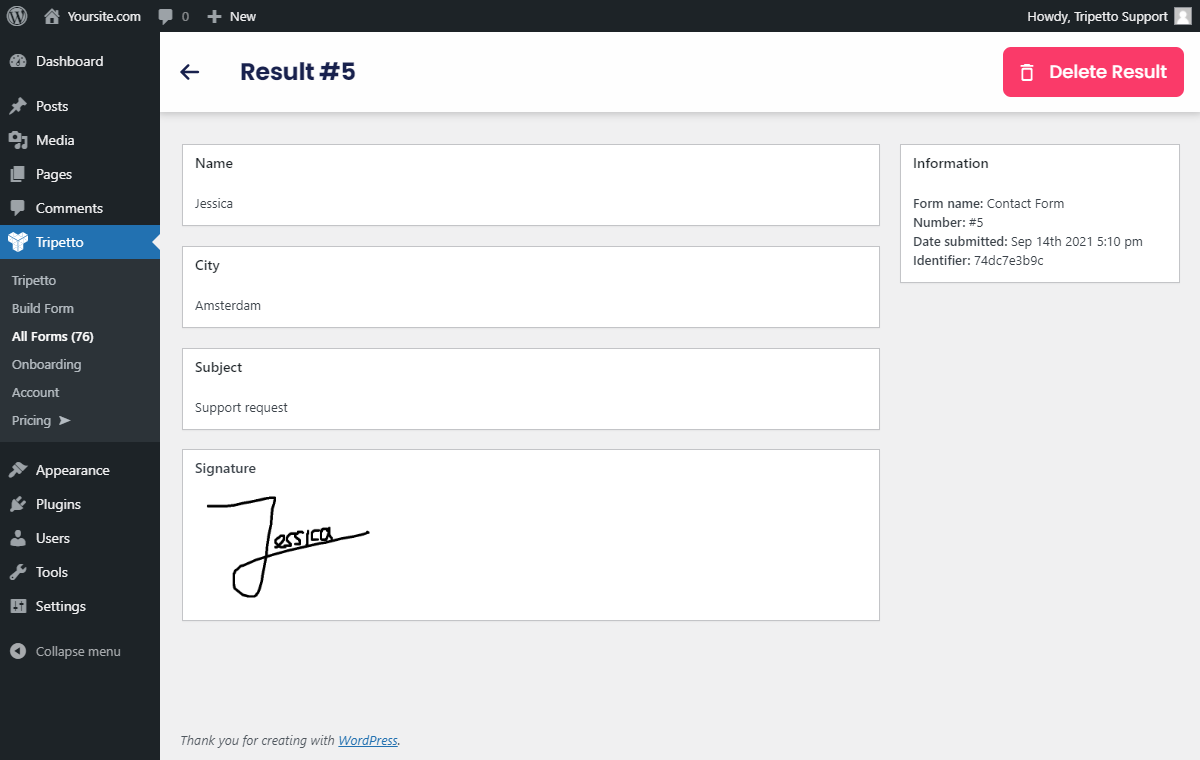
View result
From the list of results, you can click View result to open that particular result. That will show all given answers of that result right away.
If you have a File upload block and/or a Signature block in your form, the files from your respondents are available as preview and as individual download links in the result view.
Delete results
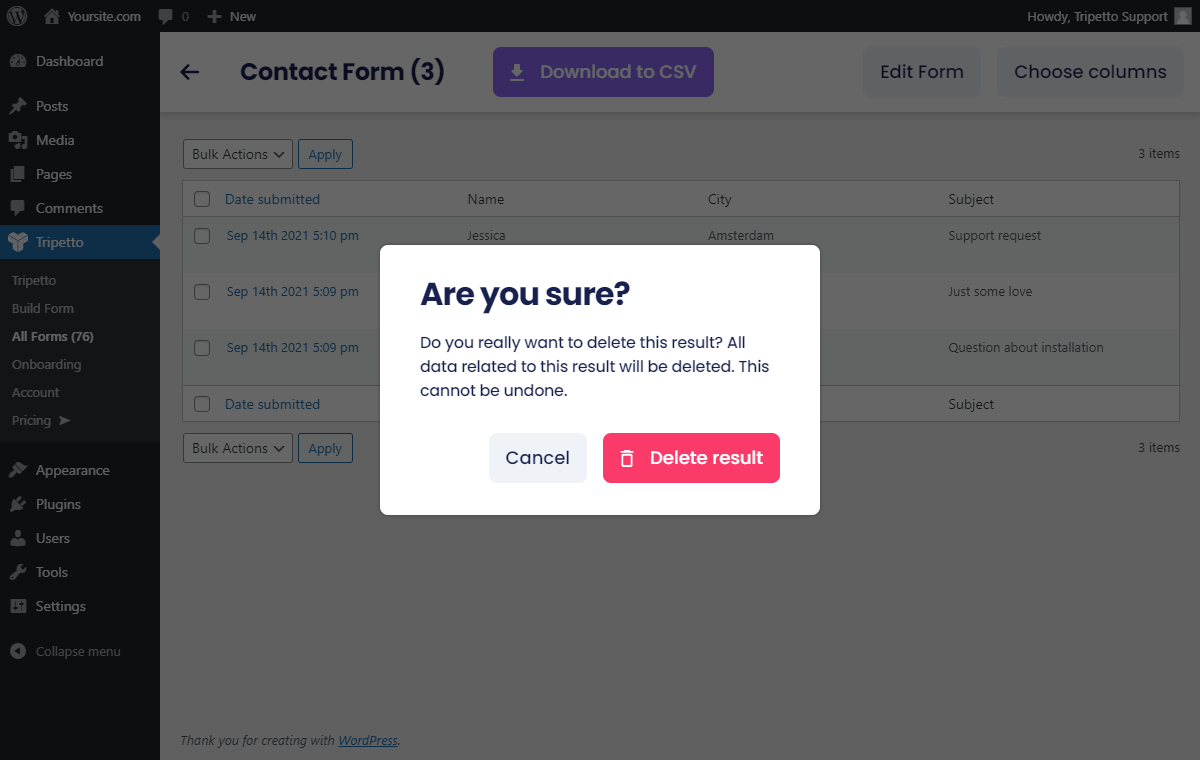
From the list of results, you can delete result(s) that you no longer need.
Single delete
You can delete single results by moving your cursor over a row in the results list and click Delete. You will be asked for confirmation before the result gets deleted. This will permanently delete the selected result.
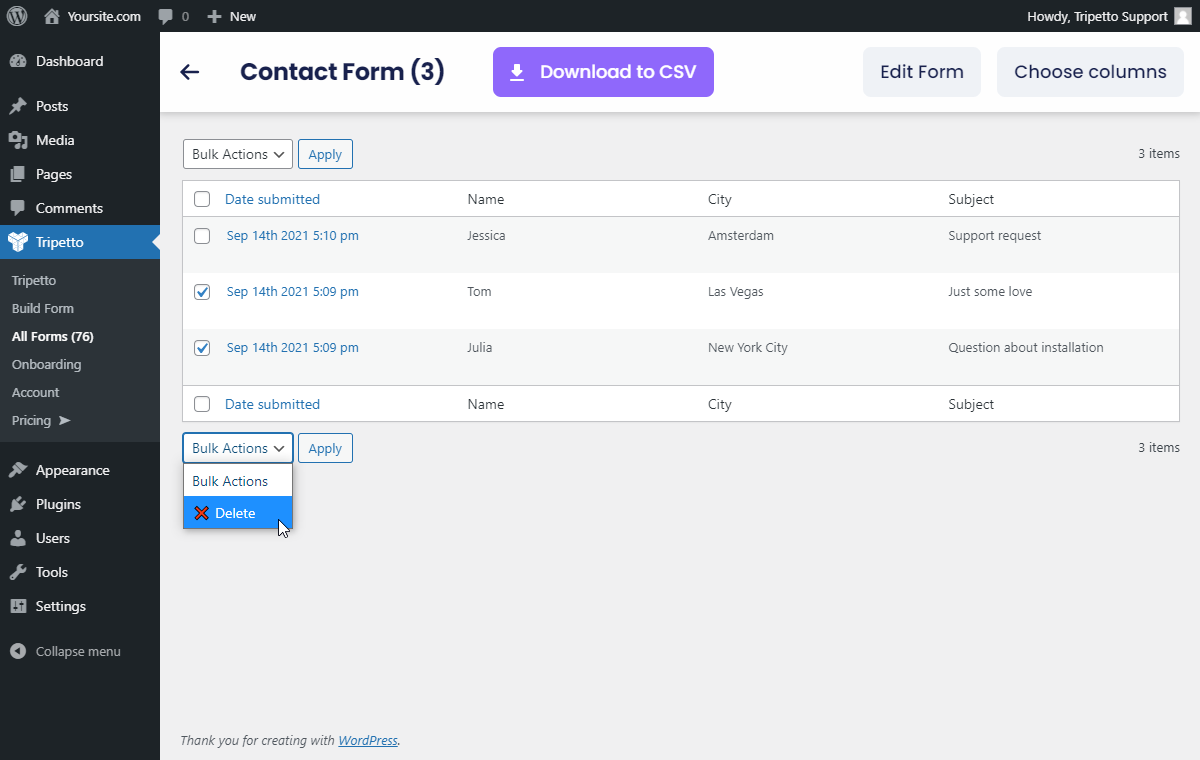
Bulk delete
You can delete multiple results at once by selecting the checkboxes in front of the results you want to delete. After you selected the desired result(s), you can collapse the Bulk actions dropdownSelect DeleteClick Apply. This action will be executed without an extra confirmation. This will permanently delete the selected result(s).
Export results
Exporting your results is very easy. From the top of the Results screen just click Download to CSV. The download of your results will start immediately and will be downloaded as a CSV file to your Downloads folder.
If you have a File upload block and/or a Signature block in your form, the files from your respondents are available as individual download links in the CSV export.
Multiple download buttons
It can be possible that you see multiple download buttons, grouped by date. This means the form has results with different data fieldsets (columns in your CSV file). This can occur when you change the structure of your form, resulting in a different fieldset of your form data. More information:
Use results
If you have downloaded the CSV file you can do what you'd like with the data. For example, open the CSV file in a spreadsheet editor, like Microsoft Excel or Google Sheets. In there you can convert the comma-separated values (CSV) to columns. More information:
After that, you can process your data, for example, by calculating averages or displaying the data in graphs. How to do that, depends on the spreadsheet editor you are using.
Receive notifications
You can also get notifications of new responses by email and/or in Slack. You can include all form data directly in those notifications. Please see the following articles for more information:
Automate follow-ups
Another option to use your results is by connecting your form with a webhook to automate all kinds of actions. More information:
Automation examples
We have made some step-by-step examples for often used automation scenarios: