How to connect to other services with Zapier
Zapier is an automation tool that helps you to connect your Tripetto response data to other online services. This article describes how to enable our webhook for this and how to configure it with Zapier.

When to use
By connecting Tripetto to other services you can do all kinds of actions with your response data, like pushing it to a spreadsheet editor (Microsoft Excel/Google Sheets) or a database, or trigger other follow-up actions. The possibilities are endless!
Zapier is a tool that can help you with this. Follow the instructions in this article if you want to use Zapier to connect your Tripetto response data with other software services.
📣 Info: Zapier alternatives
There are alternatives to use for Zapier, for example Make, Pabbly Connect or even a custom webhook. Of course it's up to you to use your favorite automation tool.
How to use
In this article we will show the steps you have to take to connect Tripetto with Zapier. You can also have a look at our global article about how webhooks work.
🚧 Warning: Zapier knowlegde needed
We assume you know how to configure and use Zapier. Tripetto support can not help you with configuring this and/or the services that you want to connect your Tripetto form to.
Step 1 - Prepare Zapier
The method we're going to use is the 'Webhook by Zapier'. You can find all details on that with the link below.
In Zapier:
In Zapier simply create a new Zap. You'll immediately see the first block called Trigger. This is where we are going to collect the responses from Tripetto.
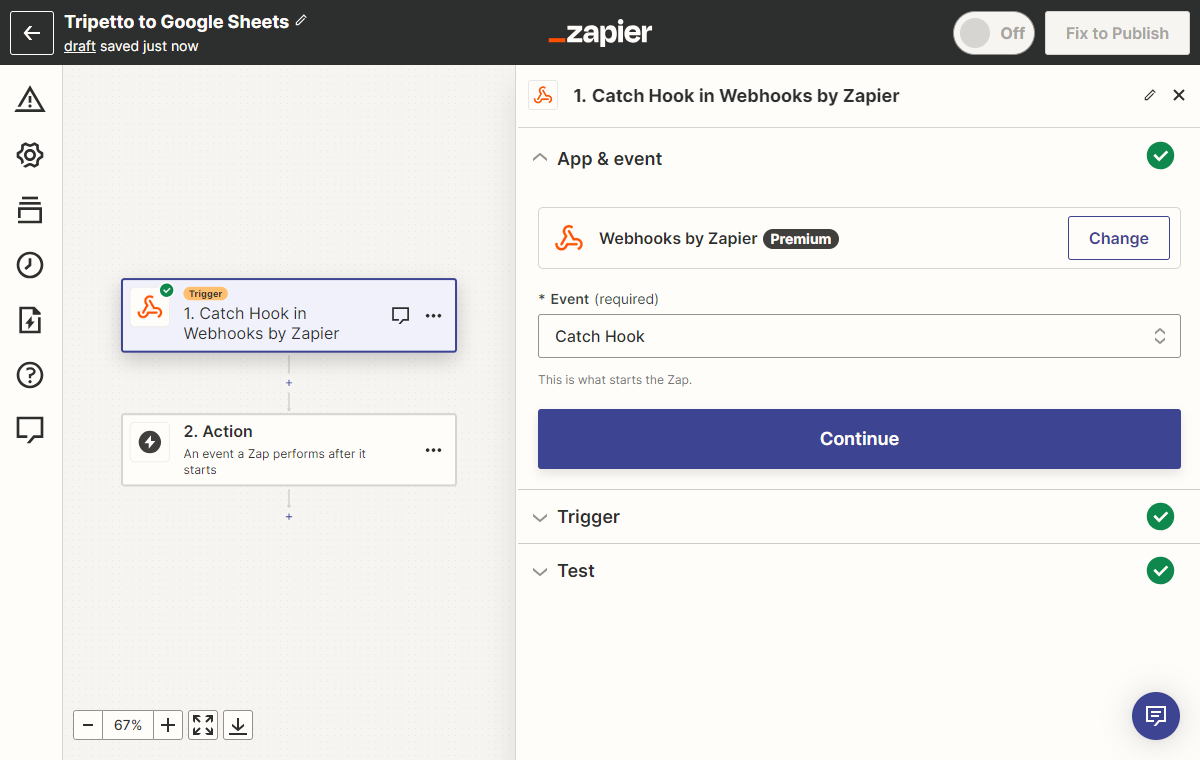
Click the trigger block and search for Webhooks by Zapier. Select the corresponding app button in the search results. The webhook app will be added to your Zap.
Next step, select the event that triggers your automation. From the dropdown, select Catch Hook.
Click Continue and ignore the next step (click Continue again).
Step 2 - Connect Zapier
Now we're going to connect your Tripetto form and your webhook in Zapier.
In Zapier:
Zapier will show the webhook URL, which you need in Tripetto. So, copy the webhook URL and switch to Tripetto.
In Tripetto:
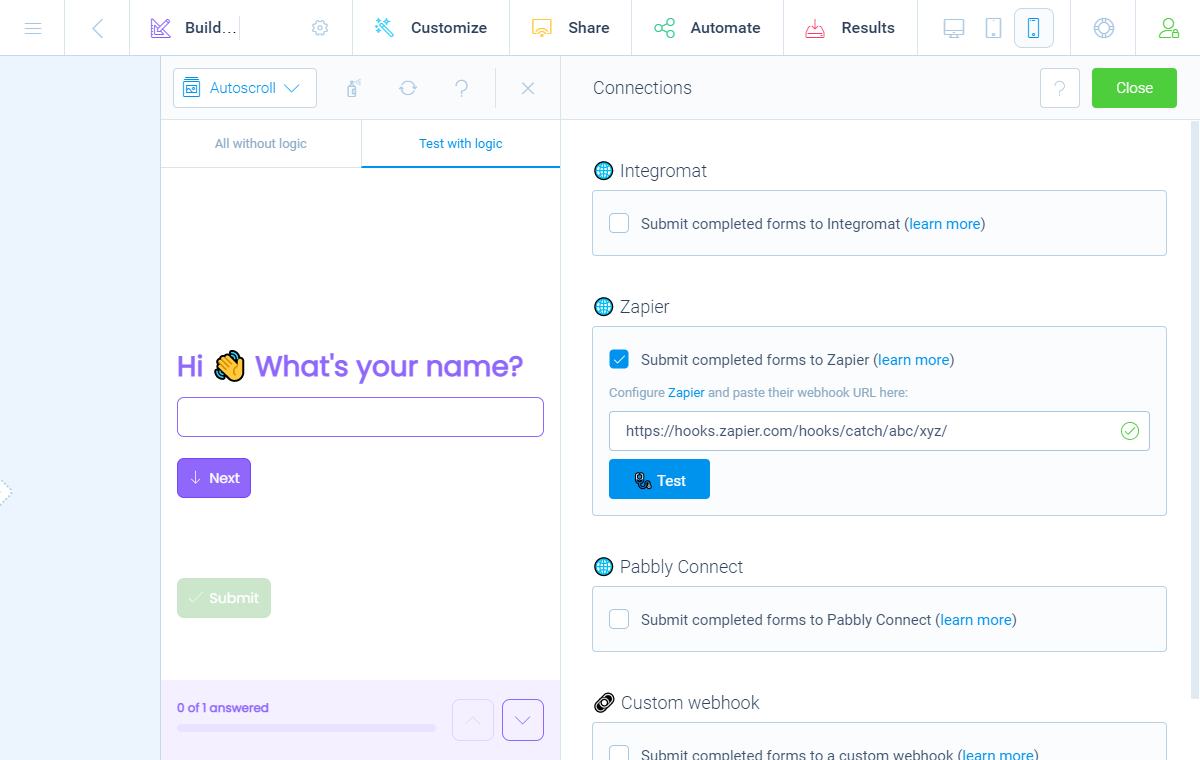
Now switch to your form in Tripetto. At the top menu bar of the form builder click Automate Click Connections. The Connections pane will show up on the right side of the form builder.
The second option in this screen is Zapier. After enabling the feature Submit completed forms to Zapier you can paste the webhook URL you got from your new Zapier Zap.
📌 Also see: Using file uploads (WordPress)
If you have a File Upload block or a Signature block in your form in WordPress, you can download the files from your respondents with a download link. By default such download links are only available to the owner of the form. You have to be logged in to the corresponding WordPress site (WP Admin) to be able to download the files. If you want to make the download links available for Make you can enable the setting
Allow access to uploaded files.For more instructions have a look at this help article about using file uploads from the WordPress plugin in webhooks:
📌 Also see: Using file uploads (studio)
If you have a File Upload block or a Signature block in your form in the studio, you can download the files from your respondents with a download link. In general such download links are only available to the owner of the form. You have to be logged in to the corresponding Tripetto studio account to be able to download the files. Only for the first 24 hours after form submissions, those download links will be available to Make.
For more instructions have a look at this help article about using file uploads from the studio in webhooks:
Step 3 - Receive response data
Next up, Zapier wants to test if the Zap is receiving data and learn the structure of the form. To test this, we're going to submit a test response in our Tripetto form.
In Tripetto:
Go to your Tripetto form and submit some response data. You can do that by simply clicking the Test button. That will send a test response from your form to Zapier with some dummy content. A better way is to simply submit a real form entry yourself via the shareable link of your form. That way you're sure that the test data meets the correct formats.
In Zapier:
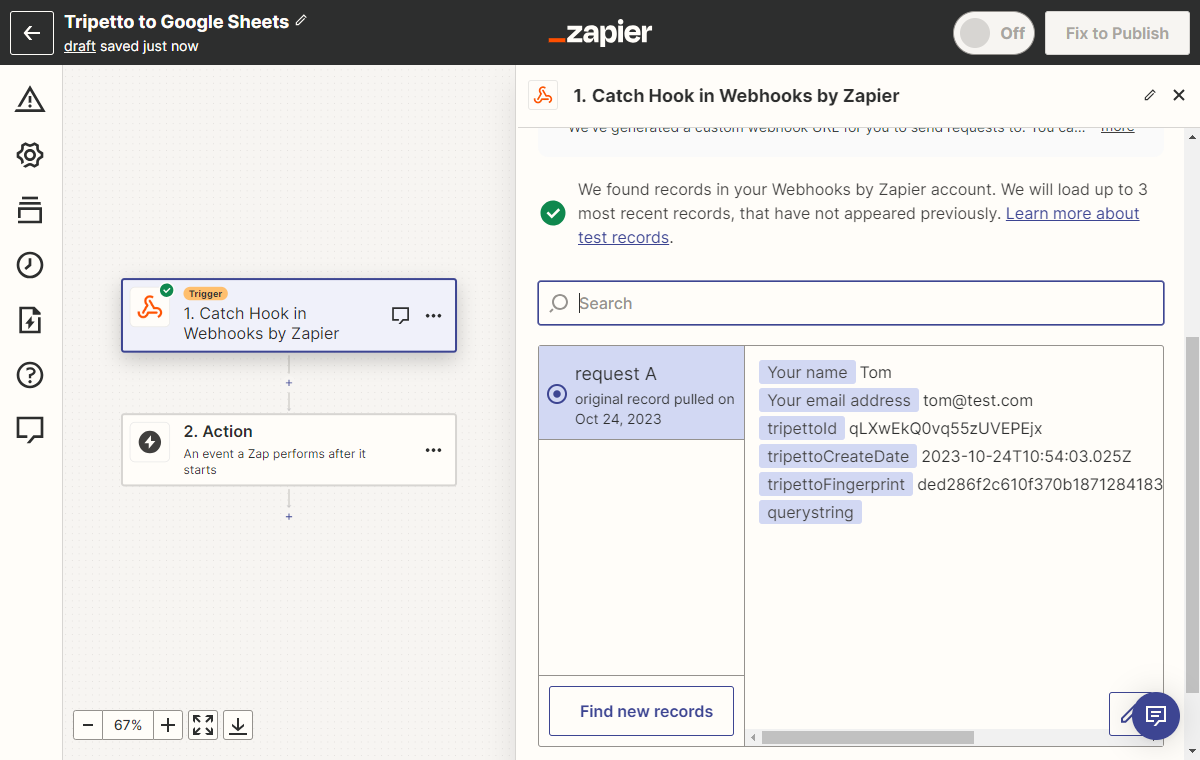
After that, return to Zapier and click Test trigger. You will see Zapier has found some data. When you click on the response, you'll see the data from the form you just submitted. Sweet, you are connected!
Finally click Continue. You have now prepared Zapier to receive Tripetto response data and Zapier understands the data you send to it. The next step is to add your desired service(s) to your Zap.
Step 4 - Add services
In Zapier you can now add the follow-up services you want to trigger.
In Zapier:
For each service you add another step and follow the instructions of Zapier. How to connect to other services differs for each service, so we can not give an instruction on that.
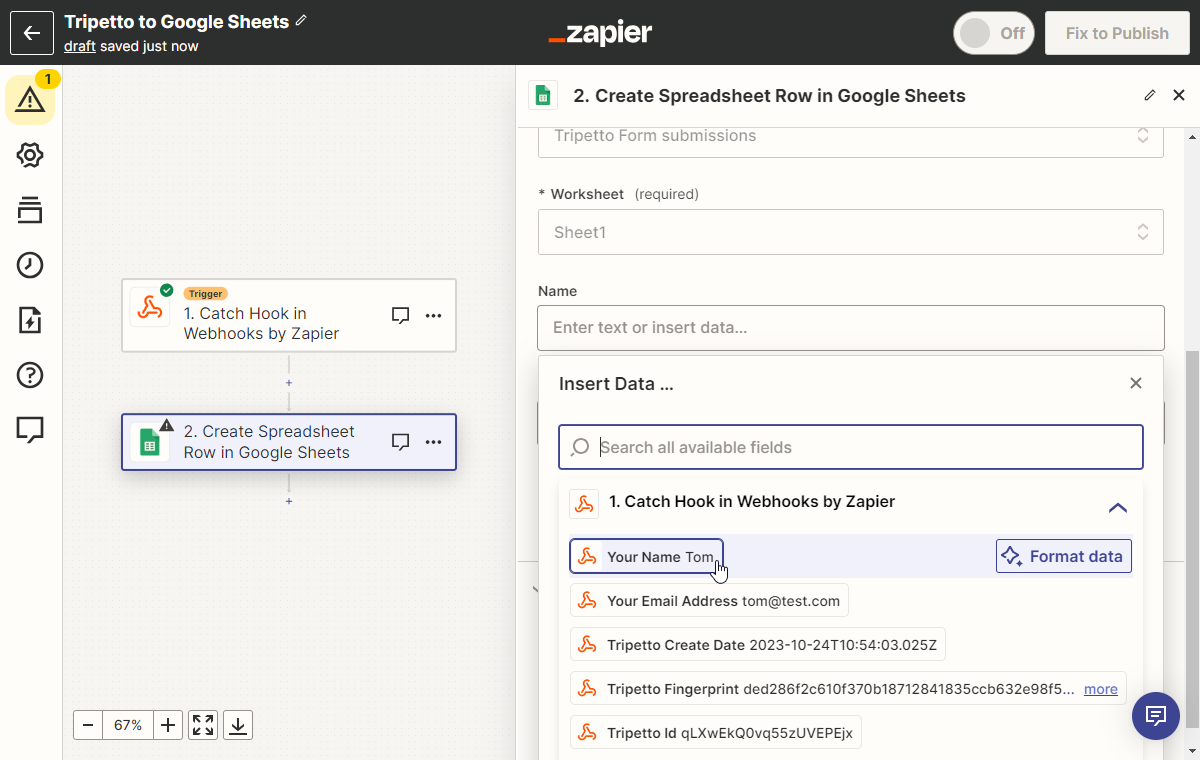
In most cases Zapier will show data fields of the connected service in which you can enter Tripetto response data. You can select the corresponding data fields that you tested with in step 3. In that way you can connect certain questions in your Tripetto form to the desired end location of another service.
Step 5 - Activate magic
If you're done editing your Zap, you can activate it.
In Zapier:
To really let the Zap receive response data, you'll need to publish it. Use the big switch at the right top corner to switch if from Off to On.
📣 Info: Confirm Zapier account
If this is your first Zap, you might need to confirm your Zapier account, by following the confirmation steps Zapier provides.
From now on, each completed submission of this Tripetto form will send its data to Zapier and Zapier will execute the magic into other services.
Discover the possibilities!
Zapier supports lots of great services to connect to.
Examples
We listed some common used scenarios that you can start with right away!
- Zapier
- Zapier
- Zapier
-


Tripetto to Woocommerce
Create a new customer and create a new order in Woocommerce based on Tripetto response data.
Zapier - Zapier
-


Tripetto to Airtable + Stripe
Add a new record to an Airtable database with all Tripetto response data and create a transaction in Stripe.
Zapier
All Zapier apps
Take a look at the endless possibilities of services in Zapier in their apps overview. Just make sure you configure their webhook connection as described in this article and then integrate it with the service(s) you want.
