
How to Save Form Data to a Database in WordPress (A Step-by-Step Guide)
Form data in a consistent and safe format has lots of value to your business. This post will show you how to save WordPress forms to a database!
Your website’s forms are central to almost everything you do. Forms are a direct way to generate leads, collect information, and even run questionnaires, surveys, and polls. All of this data has to get to you in one piece, with a high level of accuracy – especially if you handle sensitive data. As such, you’ll want to save your WordPress forms to your database, as this is the best place for it.
A WordPress plugin is an ideal way to do this within the platform. There are lots of solutions available, but you’ll need to choose the right one. Good usability and an intuitive experience will net you just as many gains as accurate information.
As such, this tutorial will show you how to save WordPress forms to a database using a popular form builder plugin. First, though, we’ll look at how forms can help you, and how contact form plugins will handle the data you collect.
How WordPress Forms Will Help You Collect Information
At its core, a WordPress form will help you collect data on its users. A typical use case is a WordPress contact form that gives you the option to sign up for a newsletter. You’ll ask for an email address, then use it to send out further correspondence targeting that user:

However, you can also use forms for more complex applications. For example, you can use them as part of an online store to sell products and services.

A form is also a fantastic lead generator. A simple registration or contact form can help you gather information on potential users. You then get to target them with direct marketing. This could be through newsletters, asking them to sign up for an account, subscribing to dedicated product updates, and more.
Overall, a WordPress form is near-essential, and you’ll have a number of them on your site. However, this also means a lot of data will pass through them. As such, you’ll want to make sure your chosen solution handles this information in the right way.
How Most Form Builders Handle Your Data
We’ll get onto form builder plugins in a minute. However, there’s one part of the puzzle worthy of note now: data collection and storage. Most Software as a Service (SaaS) form builders will take the information that a form collects, and store it on their own servers.
This takes the data from your infrastructure to theirs, and it can make you dependent on its services. This means you’ll have to pass control of lots of aspects to this third-party: uptime, data protection, storage, maintenance, and recording accuracy.
Because of this, you’ll want to instead look to store WordPress form data in your database. You’ll want to consider this preferred option for a few reasons:
- It’s the most ‘controllable’ way to save sensitive data, in that you can handle the entire process from your WordPress dashboard.
- You can take the information you collect and use it elsewhere. For example, you might pass it to a Customer Relationship Manager (CRM) – you have the option.
- By extension, you can import the data you collect to email marketing platforms, or the aforementioned CRM. Again, the choice is yours.
- Analysis is an important facet of any data collection strategy. You’ll have the option to connect your WordPress database to platforms such as Google Sheets or Microsoft Excel.
Also, you have a greater number of options to save your WordPress forms to a database. For example, other than a direct save, you can connect to an external database using ‘webhooks’. This is something we’ll cover later on, but you have tremendous scope with how you use your data if you choose to save it in this way.
The Different Ways You Can Save WordPress Forms to Your Database
For many WordPress websites, there are two ways you can save WordPress forms to the database:
- Manual coding. This will give you a good level of control, and offer you the ultimate in flexibility and versatility. However, you’ll need coding knowledge such as HTML, JavaScript, CSS, and especially PHP and MySQL.
- Using a plugin. WordPress plugins can offer the same versatile and feature-rich options as manual coding, but with greater reliability. You also won’t need to dedicate as much time or maintenance to the plugin, as the developer will handle this. What’s more, you won’t need technical knowledge either.
Over the rest of this tutorial, we’re going to look at using plugins. Let’s take a look at the form builder plugin we recommend next.
Introducing Tripetto
Tripetto is one of the best WordPress form plugins around. It offers a deep set of features and functionalities, along with some unique additions that make it stand out.

It’s a user-friendly way to create smart, conversation forms that can adapt to your needs in a number of ways:
- You can use advanced conditional logic, actions, and calculations to set up the right conversational ‘flow.’ This gives you the opportunity to create concise, engaging, and relevant forms. In addition, you can ensure you only collect the data you need and keep your questions relevant. This is a key factor to create a good User Experience (UX).
- You’ll create forms using a drag-and-drop builder, that doesn’t require any code to use. There’s a live preview built into the interface, so you can see how the form looks on the front-end of your WordPress site, both with and without logic implemented.
- Speaking of customization, as well as dozens of form field options to choose from, Tripetto also lets you personalize everything from the color and shape of your buttons to the overall look and feel of the form. As well as offering templates to get you started, Tripetto also offers unique ‘form faces’, that let you re-skin your forms in seconds without affecting the underlying functionality. You can choose from a classic layout, an autoscrolling one, or a chat form face to help create a ‘question and answer’ style of form.
Tripetto also offers specifics when it comes to saving your form data to the WordPress database. The big feature here is data storage autonomy. You can ensure data privacy and compliance with data regulation guidelines such as the General Data Protection Regulation (GDPR.) Tripetto differs from SaaS form builders in that it isn’t reliant on external infrastructure and storage.
What’s more, you have a full-featured way to connect to other third party services if you wish using webhooks. You’ll need a dedicated automation app such as Zapier, Make, or Pabbly Connect. From there, Tripetto lets you enter a webhook URL from your app, and will make the connections you need to sync everything together.
How to Save WordPress Forms to Your Database (In 3 Steps)
Before you experience a better way to save WordPress forms to the database, you’ll need to purchase a Tripetto plan that starts from $99 per year. Once you do this, you’ll also need to install and activate the plugin on your WordPress website. The final setup step is to go through the onboarding wizard:

At this point, you can create your form, make it live, and begin to collect data. Once you build up replies, you can begin to work with them.
1. View the Results of Your Form
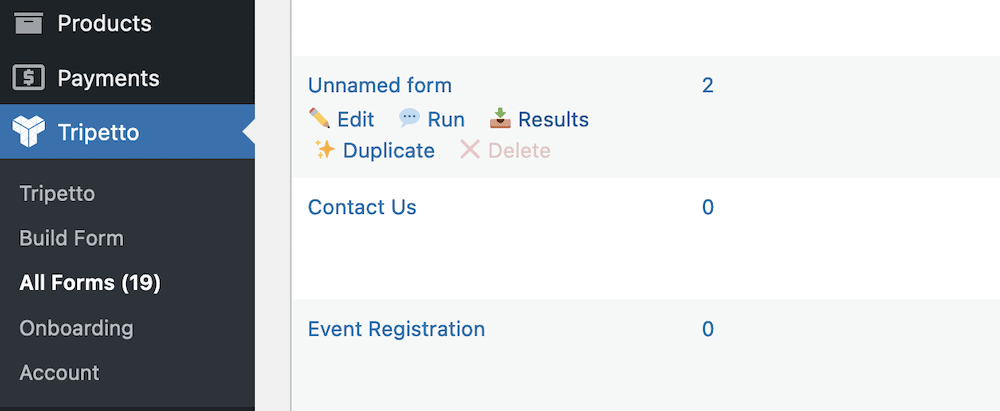
First off, you’ll want to view any form results you receive. This is straightforward. Within your Tripetto form, head to the Tripetto > All Forms screen within WordPress. This is a list of every form within your instance. You’ll need to scroll to find the relevant form, then hover over it to bring up some further context links. The Results link will send you to the right screen:
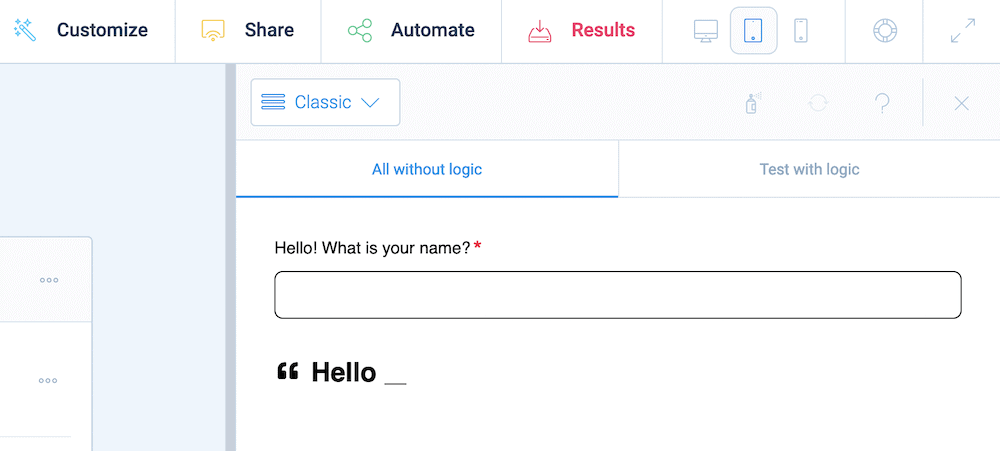
Note that you can also click the Results tab on the Tripetto storyboard for your form:
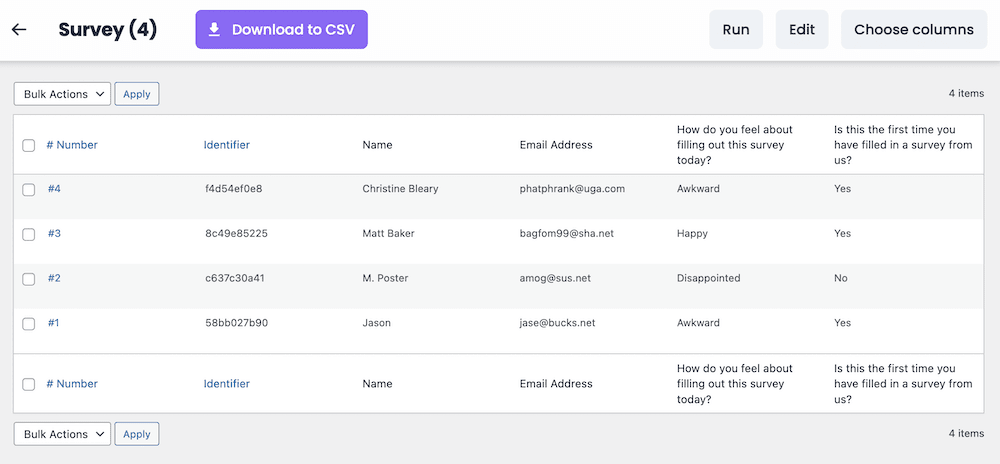
Regardless, this link will bring up a list of your form’s submitted data:
In the next section, we’ll talk more about how to work with them.
2. Decide Which Data You Want to Export (And Delete What You Don’t Need)
There is a good level of customization when it comes to how you use the data you collect. In the majority of cases, data saves at the point of submission, other than some edge cases. However, you can specify the Exportability of data for each individual Block of your form.
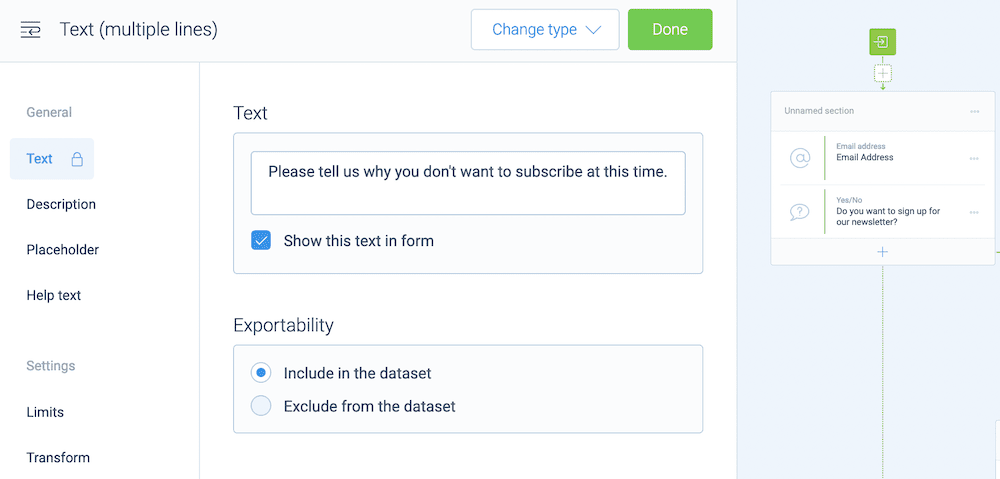
In short, this helps you either save the dataset, or ignore it. Within your form’s results screen, you can see a default selection of data you can work with. However, if you click the Choose Columns link, you can customize this to your needs:
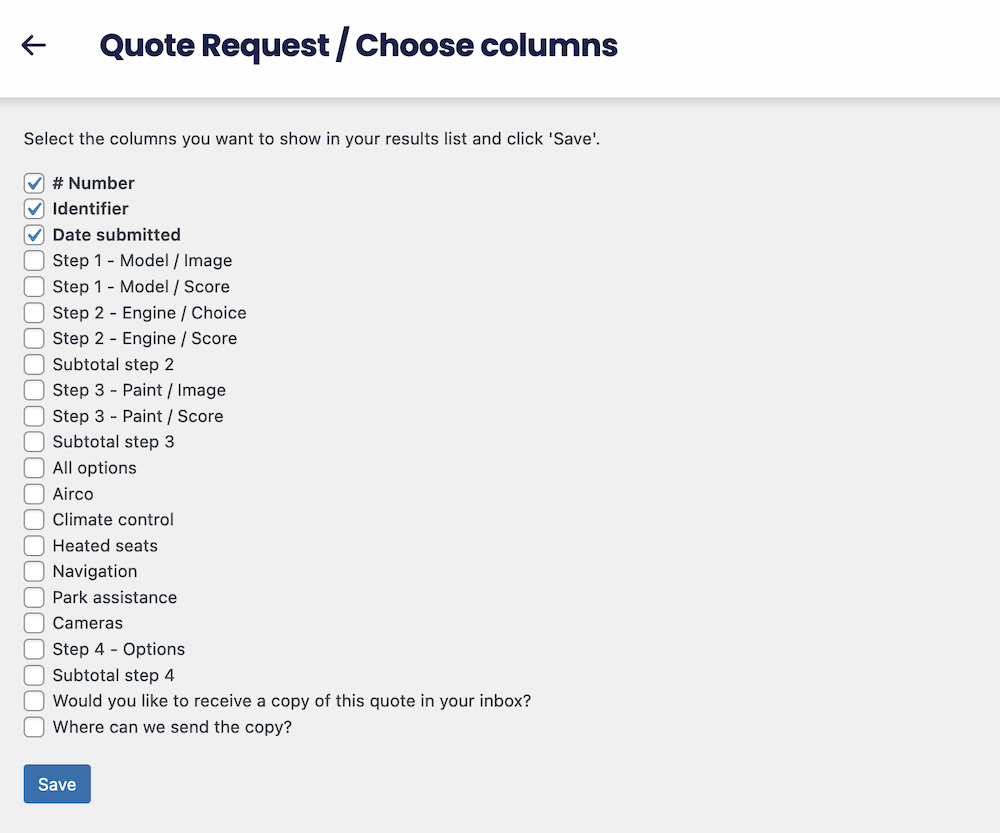
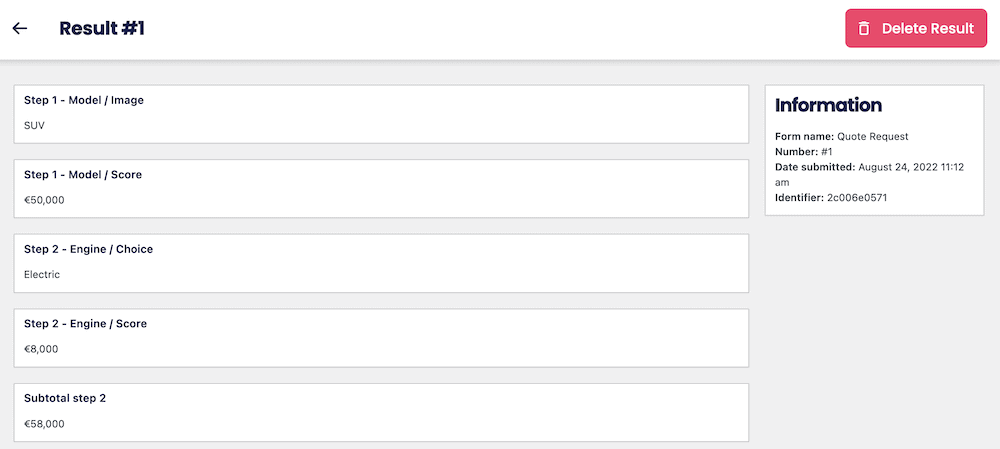
It gives you a way to view individual results for specific Blocks, which can be valuable. You can even view individual submissions to your form:
Using the checkboxes and the Bulk Actions drop-down menu, you can also delete results from your form:
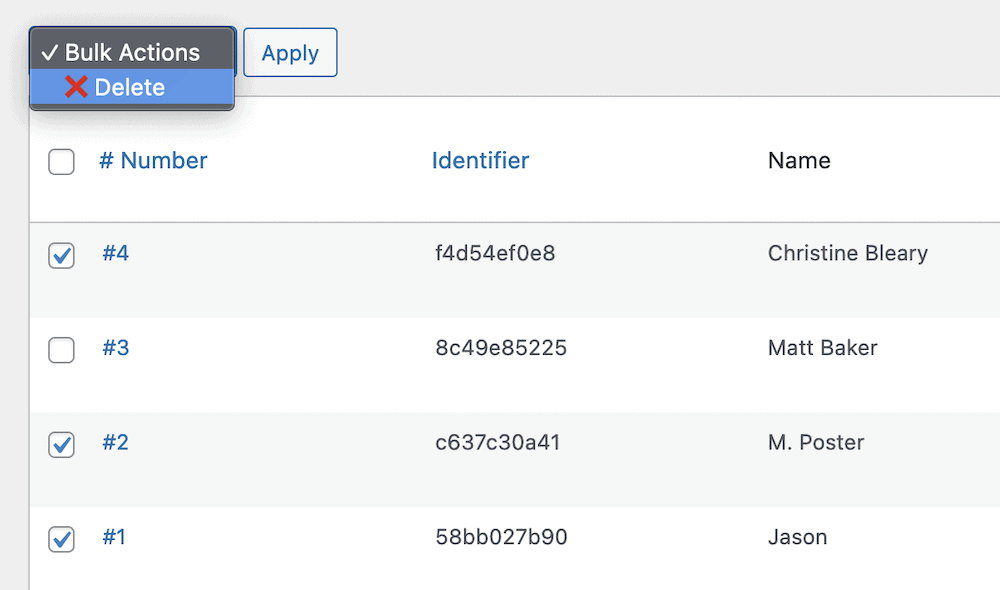
This helps you focus your datasets before you look to export them. In the final section, we’ll look at this further.
3. Export Your Data as a CSV or in an External Database
If you want to export your data as a CSV file, it’s straightforward to do so. You’ll click the Download to CSV button within the Tripetto Results screen:

If you use multiple File Upload Blocks in your form, you’ll be able to view the download links within your CSV too.
From here, you can import your CSV to Google Sheets or Excel, although this isn’t your only option. You can connect to Google Sheets and store data within using webhooks. This gives you plenty of extra ways to use your data without only using Tripetto. When it comes to how you can save your WordPress forms to the database, you have plenty of choice.
Manage Your Contact Form Data Better with Tripetto
For situations where you need easy data management and better analysis – along with the need to handle sensitive and private data – you’ll want to save WordPress forms to the database. The good news is that you can do this with ease if you employ the right WordPress form builder plugin.
Tripetto makes the process of creating tailored forms easy. It gives you lots of customization scope through form faces, the drag-and-drop builder, and a wide range of question types and Blocks. None of these require coding knowledge to implement, despite the complexity of some of the functionality. For example, you can use advanced conditional logic to create custom smart forms that attract conversions.
In addition, Tripetto saves all WordPress forms to the database. It doesn’t rely on any third-party infrastructure, which means you can better comply with data regulations.
For $99 per year, you can have a single-site license for Tripetto, with no hidden fees or add-ons to unlock the full functionality. What’s more, it comes with a 14-day money-back guarantee.

