
How to connect your WordPress forms to Zapier - Complete Guide (2023)
Forms become very powerful when you connect them to other apps. This article shows how you can connect form data from WordPress to other services with Zapier.

Forms are an integral part of any business. They can be used for customer feedback, lead generation, or data collection. That on its own already makes forms very valuable for your business, as it’s an easy way to connect with your users or customers.
But what if you want to do more? What if you want to collect data and send it to a different service? Or store it in a different place? Or analyze it in a different way?
In this article we’ll explore how you can connect your WordPress forms to Zapier - a tool that lets you automate tasks between different apps.
What is Zapier and how does it work?
Zapier is a web service that allows you to connect different web applications together. It can be used to automate tasks between different applications or add new functionality by connecting it with other applications.

Zapier acts as a middleman between two (or more) of such applications. When a trigger event occurs in one application (for example, when a new form submission is done), Zapier will send an event notification to the connected application. The connected application will then perform one or more actions based on the event. And the great thing is you can use data from any step in your automation in all next steps. So you can for example use the data from a submitted form in any other service that you hook it up with.
This opens a whole new world of endless possibilities. Let’s dive into some situations in which you can benefit from such automations with Zapier.
Why would you want to use Zapier?
There are many reasons why you want to automate your business tasks in general:
The big benefit from automating processes, it saves you time and effort. You can automate day-by-day tasks that you’d normally have to do manually, without having to think about them daily. You just have to set them up once and from there on let Zapier do the work.
Automating such tasks also reduces the chance of mistakes. Manually transferring data or performing tasks always comes with the risk of errors, but once your automation is configured correctly, it always works.
Why use Zapier with WordPress forms?
There are some specific cases to use Zapier in combination with your WordPress forms:
- Data analysis automation: You might want to collect data on your website and send it elsewhere. For example send it over to Google Sheets for storing and easy analysis. Or store it in an online database service like Airtable.
- Support automation: Or you might want to automate your support flow, by letting your users fill out a Tripetto form with all information about their support request and then create a ticket in Zendesk automatically to take things from there by your support team.
- Marketing automation: Or you might want to build up a subscribers list for your weekly newsletter. With a Tripetto form you gather the names, email addresses and preferences of your potential subscribers and for each submission you add them to your mailing list in Mailchimp, Salesforce, Hubspot, or any other CRM you use.
- Service automation: Or you might want to generate a PDF file for each form response and send that to your respondent automatically, using Google Docs and Gmail.
These are just some examples, but the possibilities are very diverse. It all just depends on what you need to grow your business, or to make your life easier.
How to connect your WordPress form with Zapier?
Now that we know the benefits of automations and how Zapier can help with that, let’s have a look at how you can connect your WordPress forms with Zapier. For this tutorial we will be using Tripetto.
Tripetto is a powerful WordPress form builder plugin that lets you create smart, engaging and conversational forms. It comes with everything included for any type of form you want to create:
- A drag-and-drop visual form builder, that doesn’t require any coding skills. You draw your form flows on a visual storyboard, which especially becomes handy when adding logic to your form.
- Logic is essential when it comes to smart forms. With logic you make sure you only show the right questions to your respondents, making your forms way easier and quicker to fill out by your audience. It also makes your forms more personal, resulting in higher completion rates and less drop-offs.
- Tripetto includes all different question types you would need. On top of that it offers so called ‘action blocks’, which make your form even more powerful. Think of an advanced calculator for calculating realtime quotes, or hidden fields to store data in the background of your form.
- Of course the look and feel of your form is essential as well. That’s why your Tripetto forms are highly customizable in regards to colors, fonts and backgrounds. On top of that you can choose from 3 different form layouts for every form. You can show your questions one-by-one in the autoscroll layout. Or choose to present your form in an interactive chat layout. Or if you’re just looking for a simple form, use the classic layout to show multiple questions at a time.
- When you’re ready to go, just share your form with a direct link, ideal for sharing on your socials. Or embed it in any page in your WordPress website to let it blend with the rest of your content.
- Receiving responses is easy as well. All your collected data gets stored right inside your own WordPress database. And you can keep up-to-date with the built in email and Slack notifications for each new form response.
On top of all these features, it’s possible to connect your form responses with Zapier to automate follow-up actions in other services. Let’s have a look at how to set that up. For this tutorial we assume you already have your form ready to go and you already have a Zapier account.
💡 Tip
Below we will give quick instructions for connecting Tripetto to Zapier. In Tripetto’s Help Center you can see more detailed instructions about connecting with Zapier.
Step 1 - Prepare Zapier
To start with, let’s create a new automation scenario. In Zapier such a scenario is called a Zap.
The first step in each Zap is to determine the so-called trigger of your automation. That’s the sign for the automation to activate its magic. In this case the submission of a Tripetto form is the trigger.
In Tripetto this trigger is sent via a webhook. A webhook is a technique to send data to another location on the internet: in this case from your Tripetto form in your WordPress site to Zapier.
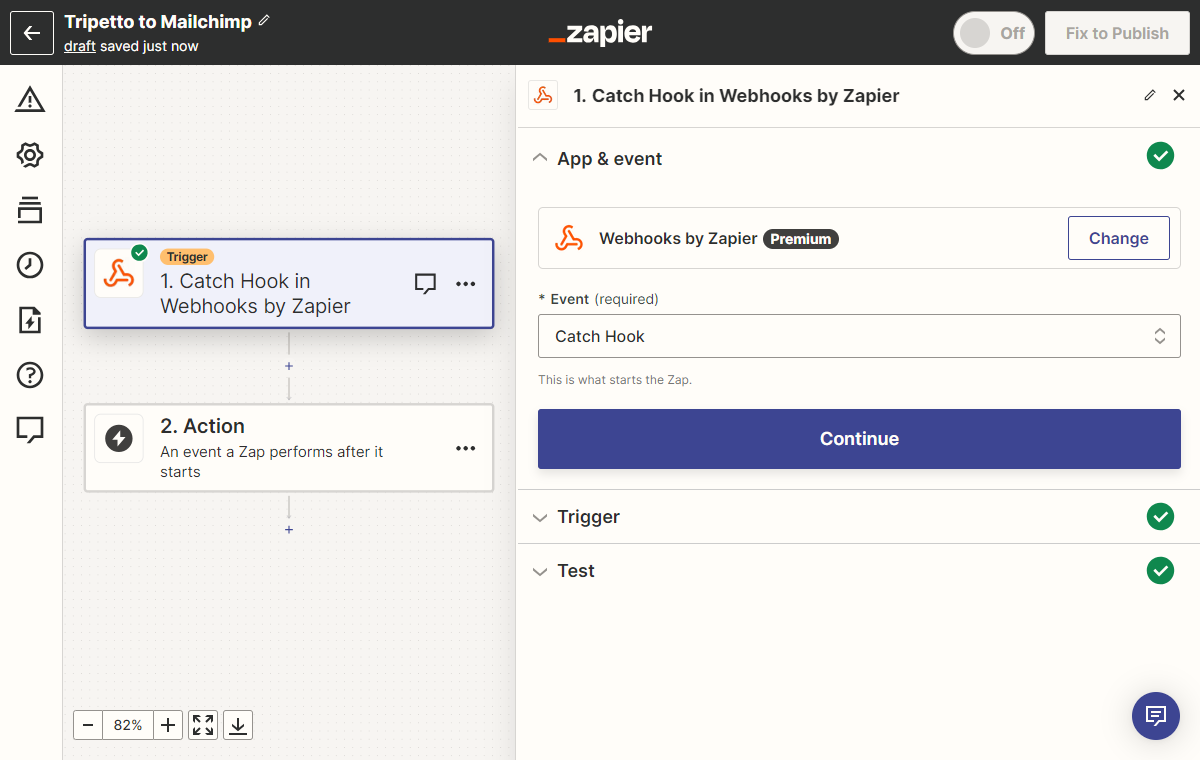
To set this up in your Zap, you click the Trigger box and you select Webhooks by Zapier. As event select Catch hook.
Step 2 - Connect Zapier to Tripetto form
After you configured the webhook trigger in Zapier, you’ll see a webhook URL in your Zap. We’re going to need that webhook URL in Tripetto, so you can copy that URL to your clipboard.
Now switch to your WordPress Admin and open your form in the Tripetto plugin. Now click Automate Connections and enable the option to Submit completed forms to Zapier. In there paste the webhook URL from your clipboard.
Your Tripetto form will now call that webhook URL including all the data that is submitted in the form.

Next step is to let your Zap learn the structure of your form, so it knows what data it can expect from your Tripetto form. To do that, simply submit a test entry in your Tripetto form. After that, switch back to Zapier and click Test trigger. Your Zap will now recognize your test entry and learn the form structure.
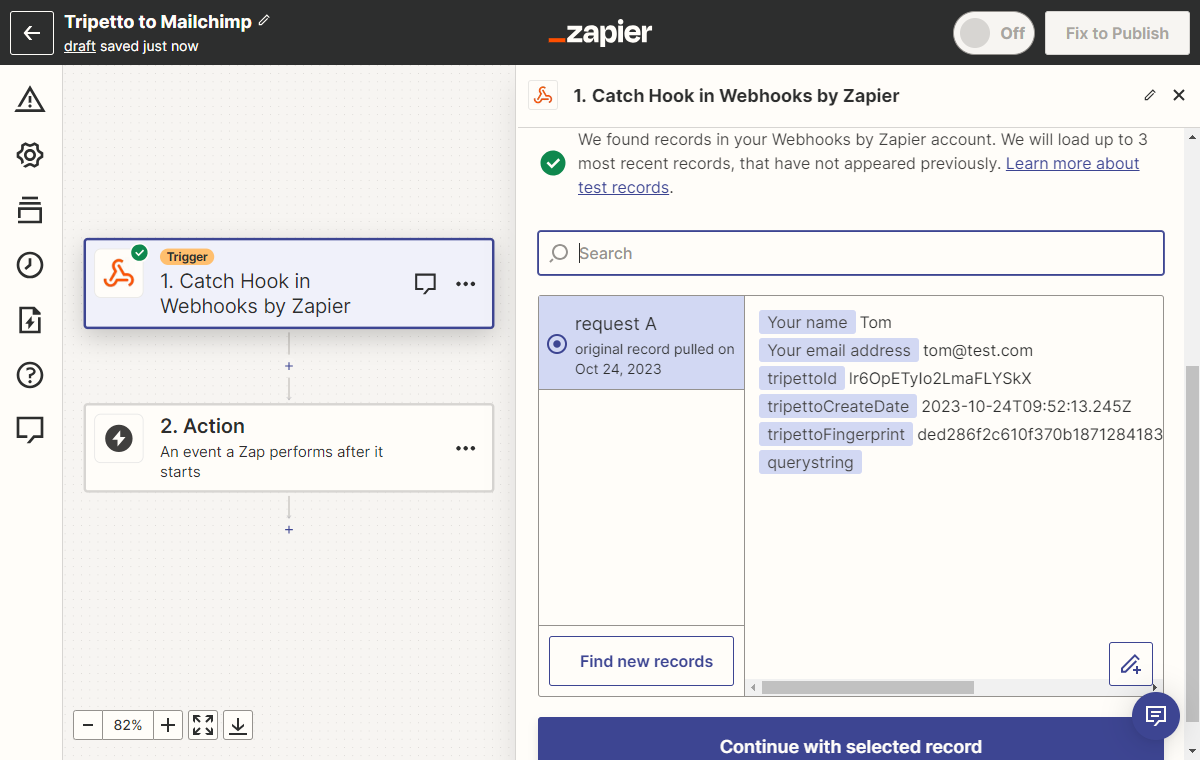
Your Zap now learned the fields of your form and you can use those in the follow-up of your automation process.
Step 3 – Build your automation
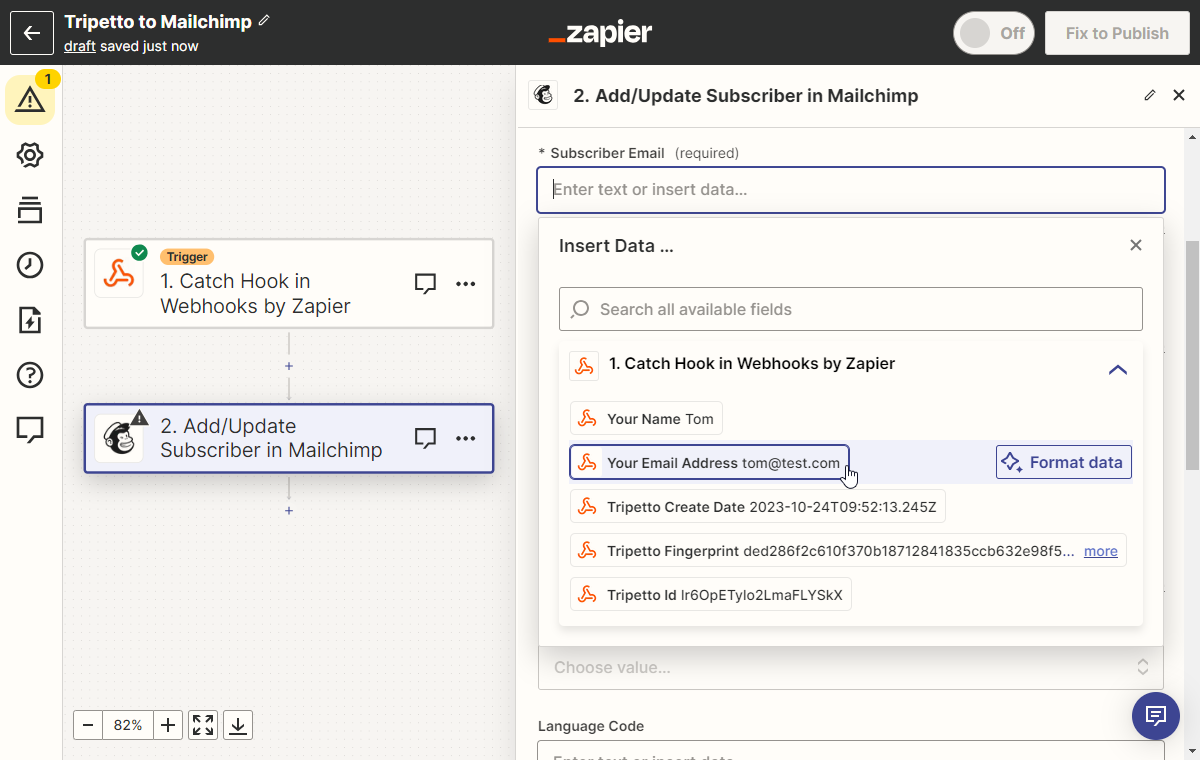
Now your form is connected and Zapier knows your form data structure, you can start building your automation process. In Zapier you can simply add steps to your Zap and in each step connect to a service, like Zendesk, Mailchimp, Google Sheets, Airtable, or one of the thousands other services that Zapier offers. And in each of those steps you can use the data fields from your Tripetto form.
For example if you are adding a subscriber to your Mailchimp mailing list, you can use the entered name and email address from the form into the corresponding fields in Mailchimp. Easy as that!
Step 4 – Activate your Zap
After you have tested the whole automation, you’re ready to activate your Zap. From now on each form response will trigger your Zap and Zapier executes the steps in your automation using the data of each individual form submission.
Conclusion
In this article we have seen how powerful forms can be when you connect them to other services with Zapier. It can help you in several aspects of your business, like analytics, support, CRM, marketing and services.
In combination with a WordPress form builder like Tripetto, it enables you to do all kinds of automations with the data you collect via your forms. With Tripetto you also help your respondents with filling out your forms in the first place. Tripetto comes with unique features like form faces and advanced conditional logic. All without any code!
The webhook connection to Zapier is included in Tripetto Pro. For $99 per year, you can have a single-site license for Tripetto, with no hidden fees or add-ons to unlock the full functionality. What’s more, it comes with a 14-day money-back guarantee.