
How to Create a WordPress Form With File Upload in 4 Easy Steps (2023 Guide)
Allowing file uploads to your forms has many potential user experience benefits. This post will show you how to create a WordPress form with a file upload option!
To gather information from users of your website, you’ll need forms. Forms can be valuable lead generators, a way to gather feedback, support channels, and much more. Better yet, even a complex form is simple to implement. However, a WordPress form with a file upload option takes a few more steps than a simple contact form.
This type of form will suit a number of different uses. For example, job applications using a file upload option let your respondents upload images and resumes to their applications. For a support application, a user can upload an image of a faulty product or a screenshot of an error.
For this post, we’re going to look at how to create a WordPress form with a file upload field. First, let’s dig into why this type of form is useful in more detail.
Why a WordPress Form With a File Upload Field Is Useful
Forms are a great way to collect information and data from users. You can also use them to generate leads, provide support, and much more. However, typical text form fields and menus might not be the best way to gather data from the respondent. This is where you’ll want to offer a file upload form in WordPress.
There are lots of use cases for a WordPress file upload form. For example:
- A job application form could let users upload a resume.
- You could allow for competition entry uploads, for example if you are running a photography competition.
- Work form submissions – for professional or academic institutions – is a great way to use a WordPress file upload form.
- A customer feedback form could also offer a file upload feature to let users send you images of the product in use.
- By extension, support channels can use images of faulty products or screenshots to help explain the problem.
Given that a file upload form in WordPress is a valuable addition, you’ll need to know how to implement one. Let’s look at this next.
The Best Way to Add a File Upload Field to a WordPress Form
While you could take a manual approach and code a file upload form to your exact specifications, a WordPress plugin is a better approach. However, not all are equal, and some options might lack the features and functionality you’ll need to create an engaging solution.
Enter Tripetto. It’s a WordPress form plugin that will help you create smart, conversational forms that your respondents will enjoy using.

Here’s what Tripetto can offer you:
- You can choose from a variety of pre-built form templates, and use a drag-and-drop storyboard builder to create forms. There are also swathes of customizations, question types, and input controls (such as radio buttons, checkboxes, drop-down menus, and more).
- You’ll use unique ‘form faces’ to switch up the look, feel, and flow of your form. These are a Tripetto exclusive, and let you use three different ways to present your form. More on this later.
- Conditional logic is a big part of Tripetto, and this is an advanced, built-in way to make your forms more intuitive and relevant for users. Again, we’ll talk more about this in a later section.
- Tripetto also lets you automate services like sending emails and notifications to customers when they fill in your forms. Using webhooks, you can connect to thousands of third-party tools and services such as Zapier, Google Sheets, Mailchimp, and much more. As well as automatically notifying users that you have received their form submissions, this also gives you the opportunity to work with the files you receive via your forms in another app. We’ll have more details on this in a later section.
Tripetto starts at $99 per year for a single-site license, and starting your journey is a piece of cake. We’ll show you how straightforward it is next.
Step-by-step Guide to Creating a WordPress Form With a File Upload Field Using Tripetto
Over the rest of the tutorial, we’re going to show you how to create a WordPress form using a file upload field. However, before this, you’ll want to install Tripetto, which is the best way to implement any type of form on your WordPress website.
The Tripetto Help Center has complete guides on how to install and activate the WordPress plugin. Also, you’ll have the opportunity to use the Onboarding Wizard to help set everything up to your liking:
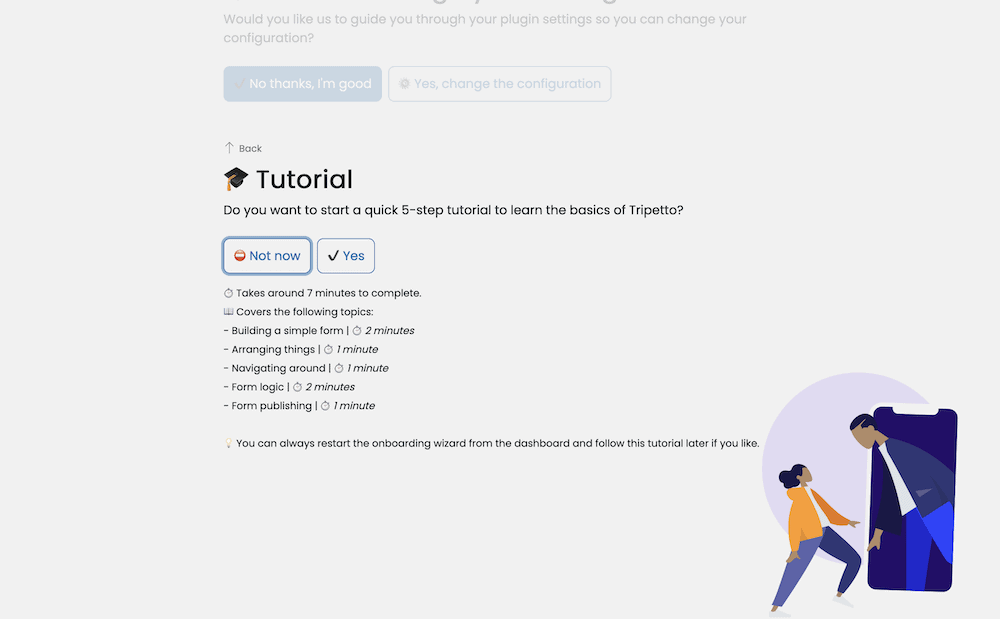
Once you do this, you are ready to start with your form. Let’s look at how to do it.
1. Create Your Form
Your first task is to create the form itself. You can go some way using Tripetto’s built-in template library. This contains lots of pre-built forms that cover many different bases. For example, you can choose a straightforward contact form, or get more complex with multi-page job applications, and others.

This is a good time to look at which form face to choose too. You can pick from the following:
- Classic. You’ll use this if you want a typical form, with no scrolling or other flow types.
- Autoscroll. This will highlight each question in turn and will move on when you click to confirm. It’s a style popular with Typeform users, but Tripetto offers greater flexibility.
- Chat. If you want to present your form as questions and answers, this form face will be ideal.
We suggest you choose a template that best matches your needs, then look to tweak it to your requirements. This is because Tripetto does the hard work for you, which leaves you to create the best form you can.
Implementing Conditional Logic
Speaking of which, you should use conditional logic if you want to create an engaging and dynamic form. This can give your form relevancy, and increase your completion rates.
Tripetto offers various advanced options when it comes to form logic. For example, branch logic can help you ask better and more relevant questions. You can skip over questions that don’t apply to candidates for a job interview. You might even try and segment applicants for different roles if you need multiple hires.
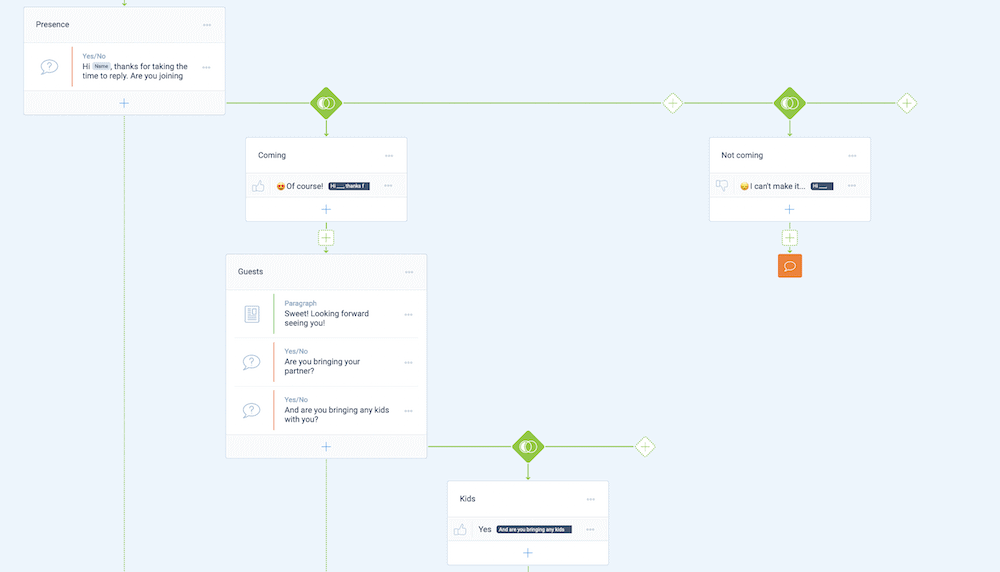
Piping logic is a great way to personalize a form. A typical example will use a respondent’s name and reference it later in the form:

There are lots of different ways to achieve your goals using conditional logic, and it’s a key feature of Tripetto. You’ll want to take a look at our guide on implementing conditional logic for your own forms at this point.
2. Add a File Upload Field to Your WordPress Form
The good news is adding a file upload form field is super straightforward. You’ll want to add a File Upload Block to your storyboard layout:

Once you place it, you’ll want to customize it. You can do this from the left-hand sidebar menu. There are lots of options here to tailor the experience to your needs.
Under the General section, you have quick options to add a title and a description:
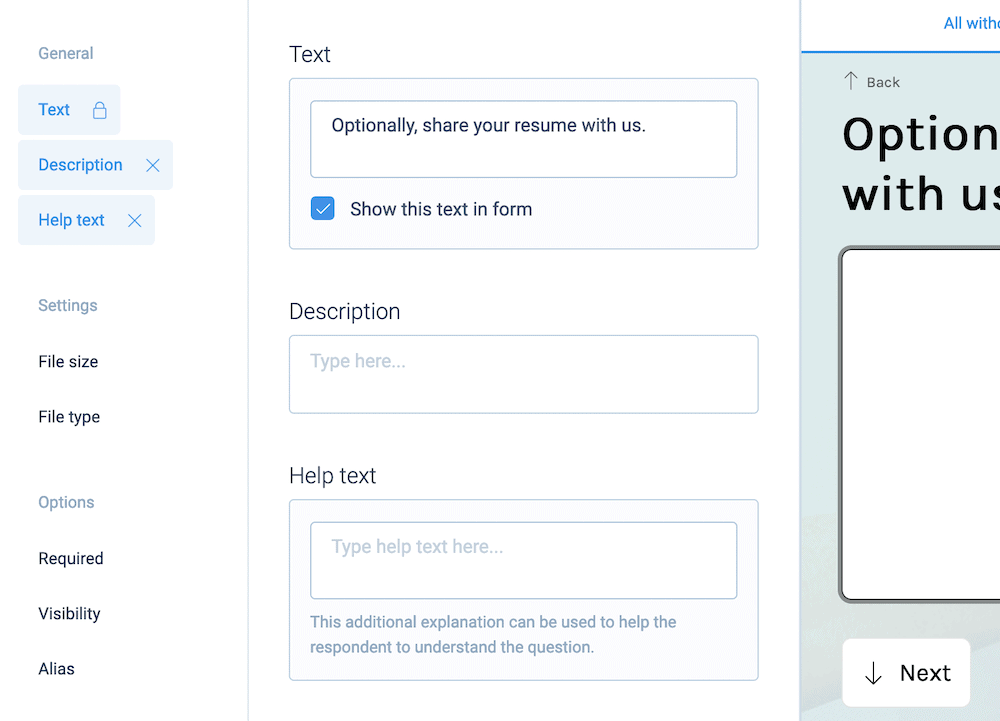
Under the Options section, you also have a way to customize the visibility of your field, and whether it’s a required part of the form:
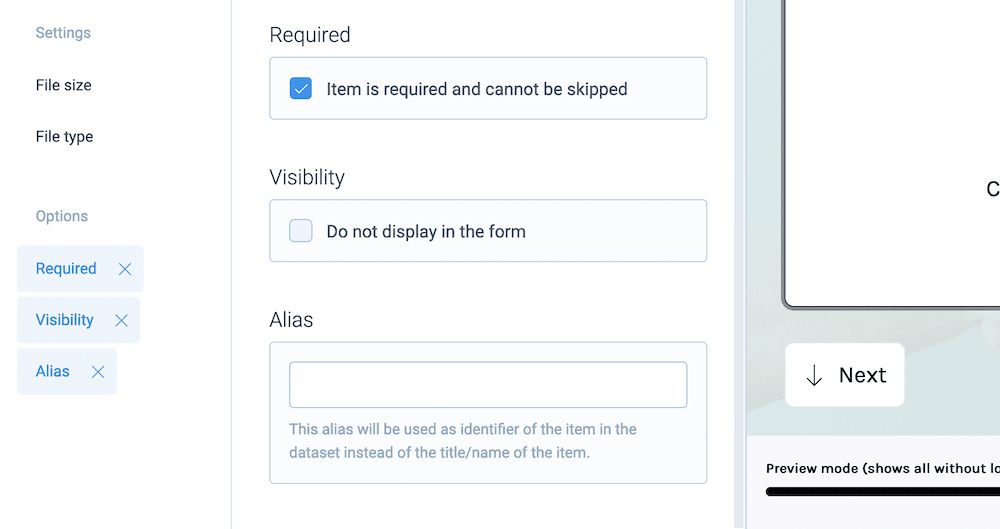
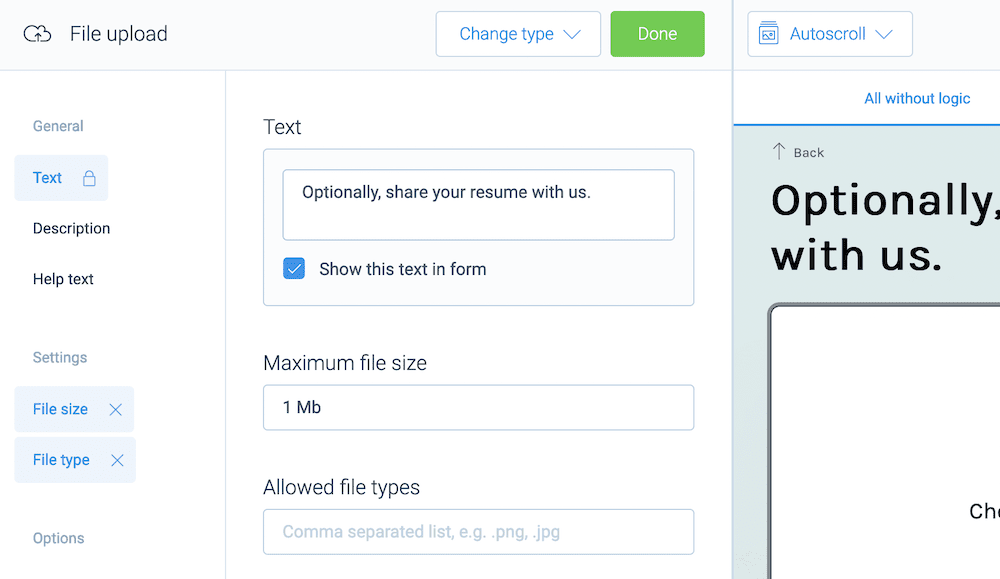
However, the Settings sections gives you two ways to customize the File Upload Block in a direct way:
- File Size. You’ll specify a maximum file size limit in Megabytes (MB,) and users who try to attach files with sizes that exceed this won’t be able to.
- File Type. This is where you’ll specify the allowed file extensions you’ll accept. It’s a good idea to use only the types of file formats necessary for the Block. For example, if you only want users to upload a resume, stick with .docx, .gdoc, and .pdf rather than .jpg, and .gif.
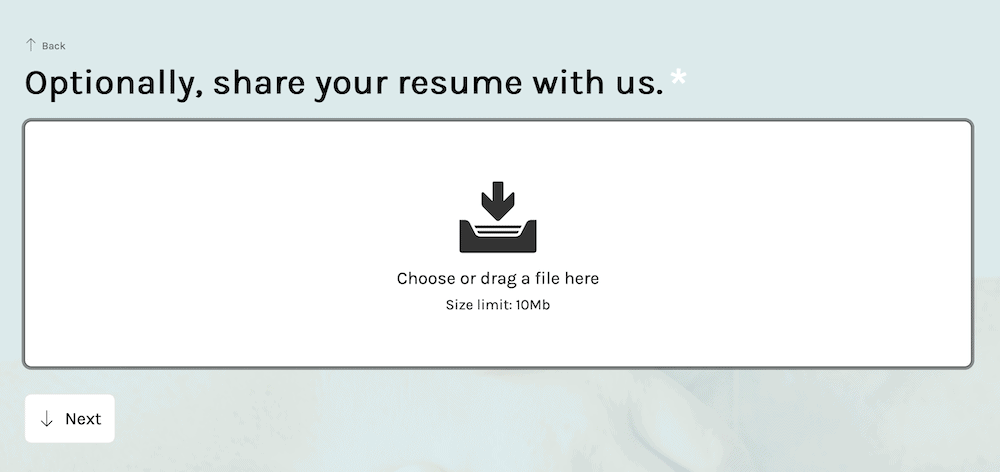
Once you set these for your form, check out the front end. You’ll see the file upload field ready to use, as per your settings:
There’s lots more you can do with the data you collect from this form. Let’s discuss how you’d bring in other services next.
3. Add Integrations
While Tripetto gives you almost everything you need to build all sorts of forms, you might have a favorite service that you’d like to integrate. Tripetto can help with this. All you’ll need is a webhook from an app such as Zapier, Pabbly Connect, or Make.

This could come in useful for almost every form you create, especially for those with a File Upload Block:
- You could connect with Google Drive to store images and documents. This could be resumes, profile images, photography submissions, and much more.
- If you connect with an email marketing platform such as Mailchimp, you can automate replies to respondents, add them to a dedicated mailing list, and much more.
- A Google Sheets connection is one way you could store customer support tickets and conversations. An even better way is to connect to your favorite Customer Relationship Manager (CRM).
To make these connections, head to the Automate > Connections screen within Tripetto:

You’ll see a sidebar pop out, and you’ll get to choose your automation app. From here, paste in your webhook link and save your changes. To make sure everything works as intended, you’ll want to test the form before you make it live.
4. Test Your Form
The testing phase is vital, because you can snuff out bugs and errors with your form before they become a problem. Tripetto builds in testing functionality through its live preview screen:

This will show you how your form looks on the front end. You can test it out both with and without logic using the dedicated tabs at the top of the preview screen. You can also quickly choose a new form face, and this won’t affect the existing functionality in any way.
Most of your users will likely use a smaller screen to access a form. You’re able to use the viewport options in the toolbar to see how this form looks on different types of devices:

Once you complete this part of the process, you can use the Share screen within Tripetto to make your form live:

While you can grab a shareable link, it’s better in most cases to embed your form in your WordPress site. Tripetto uses shortcodes, but can also integrate into the Elementor page builder too with a dedicated widget (among others).
What to Do if Your WordPress Form File Uploads Don’t Save
You might uncover a big issue during testing in that your uploads don’t save to where you specify. This can be frustrating, especially if you take the time to set up Tripetto and create a form you like.
However, there are a few tips we can recommend to get things working again. As a rule, you should always use the latest version of the Tripetto plugin. You might also want to check out your WordPress Settings screens. The Settings > Tripetto page includes a set of radio buttons to change spam protection. You should investigate this and see if it helps:

The next place to head to is the File Upload Block within your form. Once again, you’ll want to look at the File Size and File Type options here, to determine whether you have set them in the right way.
The final course of action is to see if you have a plugin conflict on your site. Firewall plugins can sometimes block access for security reasons, as can caching plugins. This goes for minification and optimization plugins too. Regardless, if you find that you can’t uncover why your WordPress form file uploads don’t save, you can open a support ticket for a further look.
Create conversational forms with a file upload option using Tripetto
A WordPress form using a file upload field is a valuable and useful element of your website. You can use it for advanced cases, such as job applications, customer support, and more.
Tripetto is one of the best form builder plugins to create a WordPress form with a file upload option. It gives you almost every tool you need to do the job, and lets you do so with ease. With Tripetto, you can create smart, conversational forms that contain advanced conditional logic.
You can also change the look and flow of the form in a flash using form faces. If that’s not enough, you’re also able to bring in your favorite third-party services using webhooks and a dedicated automation app such as Zapier, Make, or Pabbly Connect.
A single-site Tripetto license is $99 per year, and each purchase comes with a 14-day money-back guarantee – no questions asked.

