
Implementing Tripetto using React
Tripetto brings a new way of creating and deploying forms and surveys in websites and applications.

❌ This is a deprecated SDK blog article
Please note that the SDK concepts and code snippets in this article are about a deprecated version of the Tripetto SDK. In the meantime the SDK has evolved heavingly. For up-to-date SDK documentation, please have a look at the following links:
You use its intuitive graphical editor to build and edit smart forms with logic and conditional flows in 2D on a self-organizing storyboard. In any modern browser. Mouse, touch or pen.
And you then deploy these smart forms in websites and applications using the supplementary collector library. Anything you build in the editor, the collector will simply run. You just focus on the visuals of the embedded form.
We’ll explain here how to build such a collector implementation using React that’s capable of running Tripetto smart forms inside a website or application.
The basics
Before we dive into the real power-coding, let’s briefly touch on the following basics behind Tripetto.
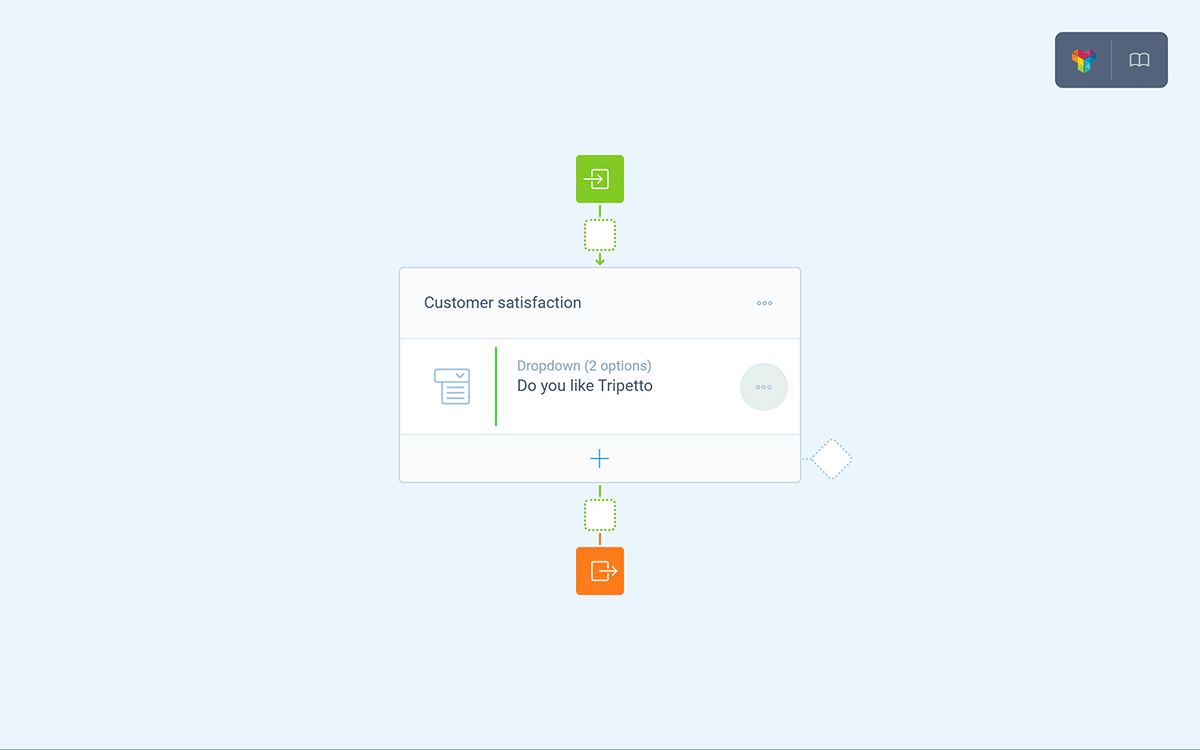
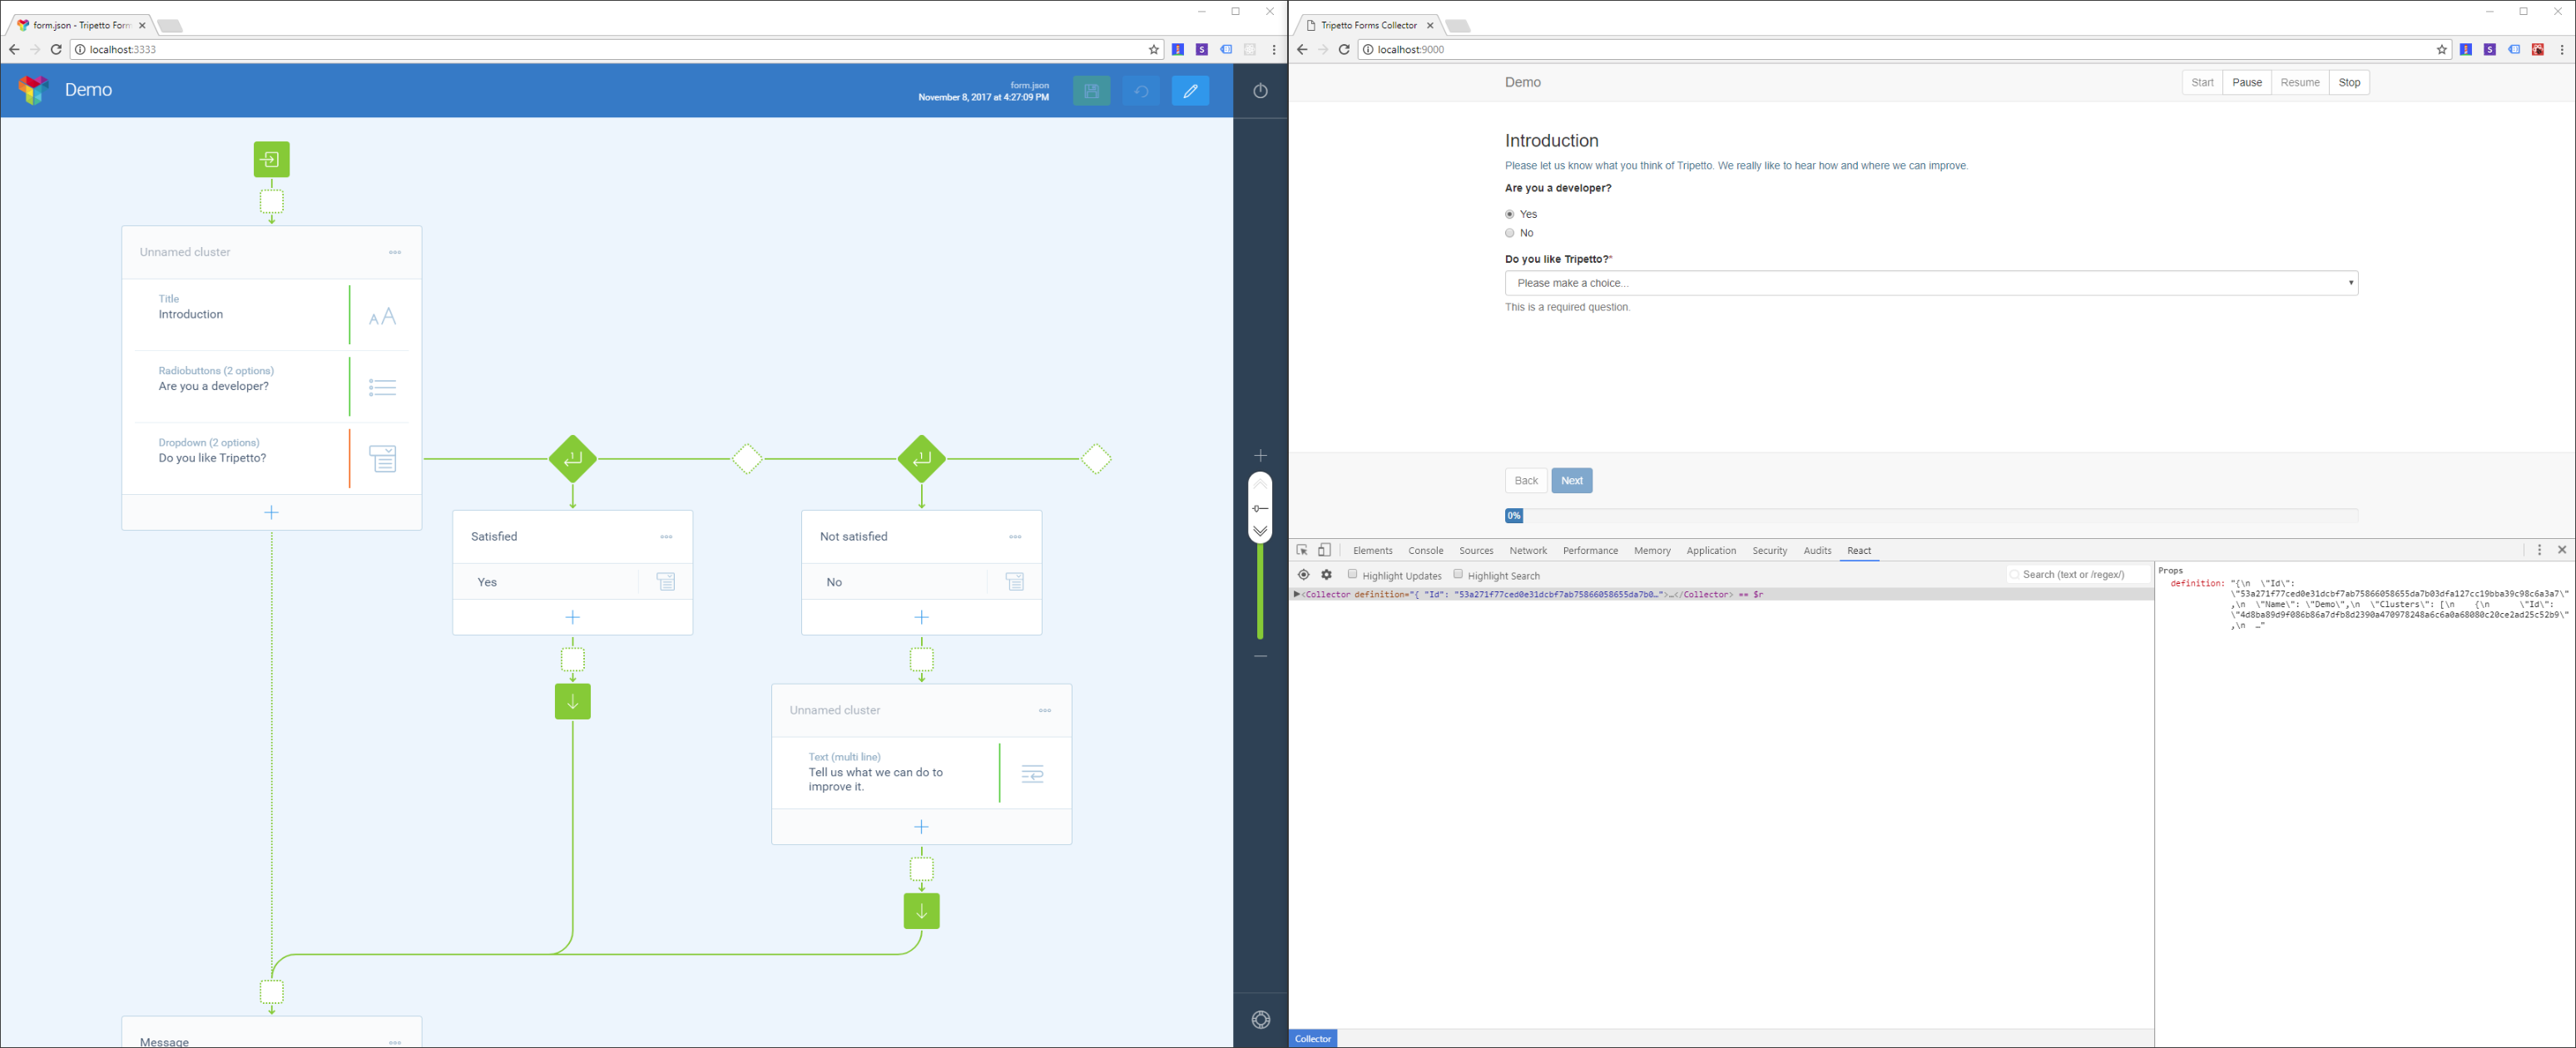
Editor
The editor is the graphical 2D form designer. It runs in any modern browser. Forms you build in the editor are stored in JSON files. We call these files form definitions. A single form definition contains the complete structure of a form. The definition file is parsed by the collector.
Collector
The collector basically transforms a form definition into an executable program. Once correctly implemented in your website or application, the collector autonomously parses any form definition you build or alter in the editor to an actual working form. You only have to worry about the visuals. We don’t impose any particular UI for the collector.
Blocks
You compose forms in the editor with the available building blocks. These essentially are the different element types (e.g. text input, checkbox, dropdown etc.) you typically use in a form. You decide which blocks to use in the editor and collector. And you may also develop your own.
That’s it for now. Let’s start coding!
📌 Also see: Custom blocks
For this tutorial we are going to use some of our default blocks. If you want to learn more about creating custom blocks, have a look here:
Part A — Setting up your project
First of all, we’re assuming you have Node.js installed. If you don’t, please go ahead and take care of that first. After that, do the following.
1. Create a new folder for your project. Then create two subfolders in there. One for our source and one for some static files:
mkdir your-project
cd your-project
mkdir src
mkdir static
2. Initialize your package.json file:
npm init -y3. Install the required packages:
npm install tripetto-collector react react-dom @types/react @types/react-dom @types/superagent typescript ts-loader webpack webpack-cli webpack-dev-server superagent --save-dev4. Create a tsconfig.json file in the root of your project folder with the following content:
{
  "compilerOptions": {
    "target": "ES5",
    "module": "commonjs",
    "baseUrl": "./src",
    "jsx": "react",
    "strict": true,
    "experimentalDecorators": true
  },
  "include": ["./src/**/*.ts", "./src/**/*.tsx"]
}
6. Setup some test/build tasks by inserting a script section in yourpackage.json file:
"scripts": {
"test": "webpack-dev-server --mode development",
"make": "webpack --mode production"
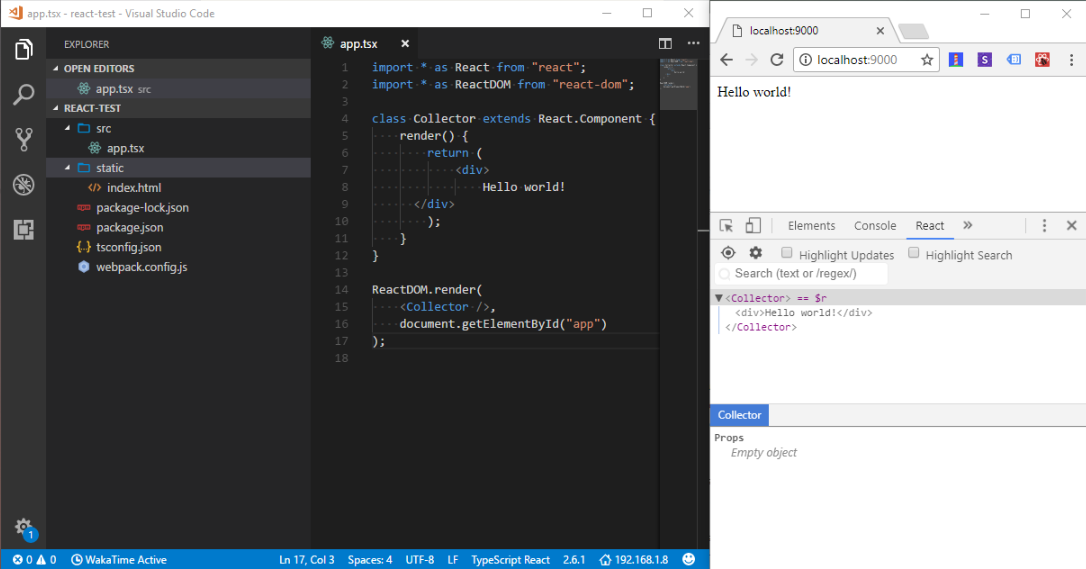
}7. Create the application entry point by creating the ./src/app.tsx file with the following content:
import * as React from "react";
import * as ReactDOM from "react-dom";

class Collector extends React.Component {
  render() {
    return (
      <div>
        Hello world!
      </div>
    );
  }
}

ReactDOM.render(
  <Collector />,
  document.getElementById("app")
);
8. Create a static HTML page ./static/index.html for your project with the following content:
<!DOCTYPE html>
<html>
<body>
    <div id="app"></div>
    <script src="bundle.js"></script>
</body>
</html>
That’s it for now. Let’s check what we’ve got!
If you’ve correctly followed the steps above you should now have this file tree:
your-project/
  src/
    app.tsx
  static/
    index.html
  package.json
  tsconfig.json
  webpack.config.js
This should now be an actual working application. We can run it by executing the following command:
npm testThis will start the webpack-dev-server which invokes webpack, compiles your application and makes it available at http://localhost:9000. You should be able to open it with your browser and it should welcome you with the iconic Hello world!. Yeah!
Part B — Coding the collector
We are going to create a React component for the Tripetto collector. It will be capable of running Tripetto forms and can be used anywhere in your React application. It accepts a form definition as a prop and we use it to implement three blocks (text input, dropdown and checkbox).
Take the steps below to get this going.
🚧 Warning: Deprecated SDK code snippets and packages
Please note that the below code snippets and used packages are about a deprecated version of the Tripetto SDK. In the meantime the SDK has evolved heavingly. For up-to-date SDK documentation, please have a look at the following links:
1. Create a ./src/helper.tsx file with the following content to implement the collector:
import * as Tripetto from "tripetto-collector";
import * as React from "react";

export interface IBlock extends Tripetto.NodeBlock {
  render: () => React.ReactNode;
}

export class CollectorHelper extends Tripetto.Collector<IBlock> {
  render(): React.ReactNode {
    const storyline = this.storyline;

    if (!storyline) {
      return;
    }

    return (
      <>
        {storyline.map((moment: Tripetto.Moment<IBlock>) =>
          moment.nodes.map((node: Tripetto.IObservableNode<IBlock>) =>
            node.block ? (
              <div key={node.key}>{node.block.render()}</div>
            ) : (
              <div key={node.key}>
                {Tripetto.castToBoolean(node.props.nameVisible, true) && (
                  <h3>{node.props.name || "..."}</h3>
                )}
                {node.props.description && <p>{node.props.description}</p>}
              </div>
            )
          )
        )}

        <button
          type="button"
          disabled={storyline.isAtStart}
          onClick={() => storyline.stepBackward()}
        >
          Back
        </button>

        <button
          type="button"
          disabled={
            storyline.isFailed ||
            (storyline.isAtFinish && !storyline.isFinishable)
          }
          onClick={() => storyline.stepForward()}
        >
          {storyline.isAtFinish ? "Complete" : "Next"}
        </button>
      </>
    );
  }
}
This class simply extends the base collector class of Tripetto. It implements a simple render function that renders the blocks and some buttons. It also implements an interface called IBlock that defines the contract for the block implementation. In this case each block should implement a method render. In other words, this class CollectorHelper is able to use all the blocks that have implemented a proper render method.
2. Create a./src/component.tsx file with the following content to implement our React component:
import * as React from "react";
import * as Tripetto from "tripetto-collector";
import { CollectorHelper } from "./helper";

export class Collector extends React.PureComponent<{
  definition: Tripetto.IDefinition | string;
  onFinish?: (instance: Tripetto.Instance) => void;
}> {
  collector = new CollectorHelper(this.props.definition);

  /** Render the collector. */
  render(): React.ReactNode {
    return (
      <>
        <h1>{this.collector.name}</h1>
        {this.collector.render()}
      </>
    );
  }

  componentDidMount(): void {
    this.collector.onChange = () => {
      // Since the collector has the actual state, we need to update the component.
      // We are good React citizens. We only do this when necessary!
      this.forceUpdate();
    };

    this.collector.onFinish = (instance: Tripetto.Instance) => {
      if (this.props.onFinish) {
        this.props.onFinish(instance);
      }
    };
  }
}
The React component shown above is actually quite simple. It creates a new instance of the collector helper (implemented in step 1) and invokes its render function when the component needs to be rendered. Since the state of the form is kept in the collector instance, the collector should be able to request an update of the component. So the rest of the code inside the component does just that. We also implement an onFinish prop that can be used to bind a function that is invoked when the collector is finished.
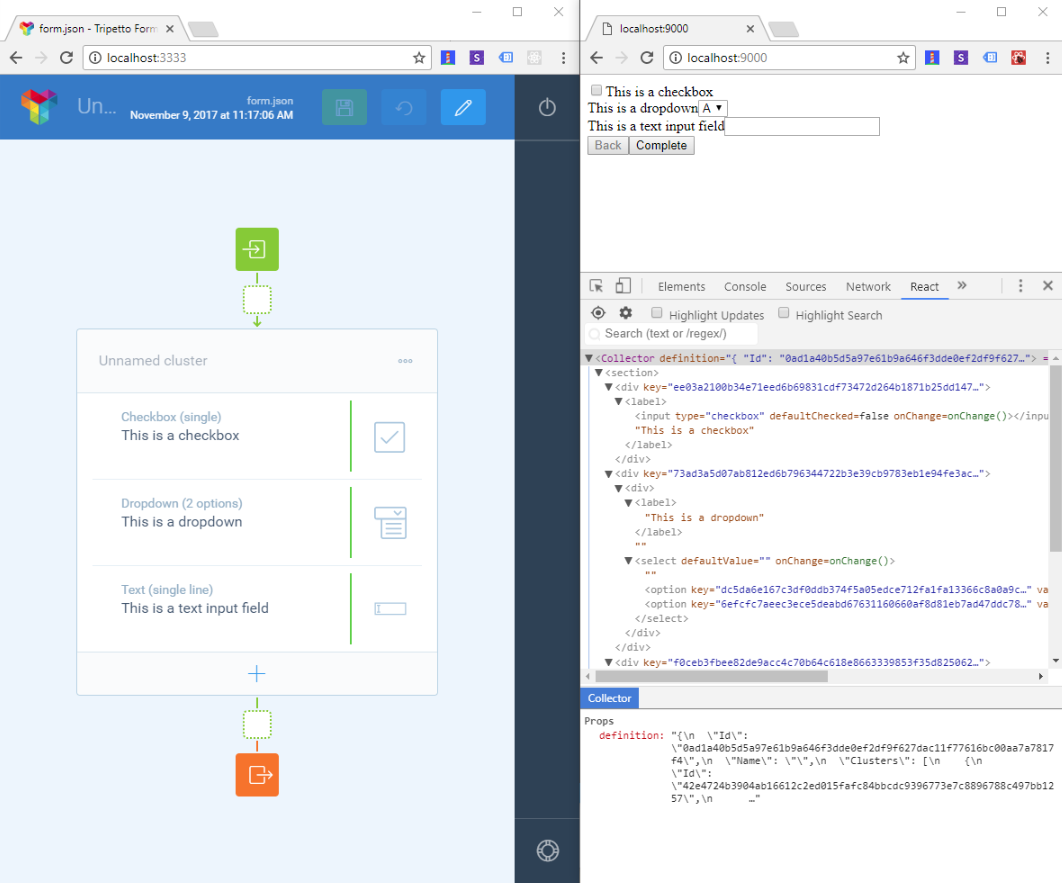
Part C — Implementing blocks
This tutorial covers the implementation of three simple blocks:
🚧 Warning: Deprecated SDK code snippets and packages
Please note that the below code snippets and used packages are about a deprecated version of the Tripetto SDK. In the meantime the SDK has evolved heavingly. For up-to-date SDK documentation, please have a look at the following links:
1. Add these blocks to the project first. To do so, fire up your terminal/command line and enter:
npm install tripetto-block-checkbox tripetto-block-dropdown tripetto-block-text --save-dev2. Add a special configuration section to our package.json file:
"tripetto": {
  "blocks": [
    "tripetto-block-checkbox",
    "tripetto-block-dropdown",
    "tripetto-block-text"
  ],
  "noFurtherLoading": true
}
This section instructs the editor to only load the three blocks we just added. Your package.json should now look like this:
{
  "name": "your-project",
  "version": "1.0.0",
  "description": "",
  "main": "index.js",
  "scripts": {
    "test": "webpack-dev-server --mode development",
    "make": "webpack --mode production"
  },
  "keywords": [],
  "author": "",
  "license": "ISC",
  "devDependencies": {
    "@types/react": "^16.7.18",
    "@types/react-dom": "^16.0.11",
    "@types/superagent": "^3.8.5",
    "react": "^16.7.0",
    "react-dom": "^16.7.0",
    "superagent": "^4.1.0",
    "tripetto-block-checkbox": "^2.0.0",
    "tripetto-block-dropdown": "^2.0.0",
    "tripetto-block-text": "^2.0.0",
    "tripetto-collector": "^1.0.0",
    "ts-loader": "^5.3.2",
    "typescript": "^3.2.2",
    "webpack": "^4.28.2",
    "webpack-cli": "^3.1.2",
    "webpack-dev-server": "^3.1.14"
  },
  "tripetto": {
    "blocks": [
      "tripetto-block-checkbox",
      "tripetto-block-dropdown",
      "tripetto-block-text"
    ],
    "noFurtherLoading": true
  }
}
3. Implement the blocks in the collector component by adding the following files:
./src/blocks/checkbox.tsx./src/blocks/dropdown.tsx./src/blocks/text.tsx
As you can see, a block simply implements a render function. These functions are automatically invoked by the collector library. Each block needs to register itself by calling the @tripetto.block decorator at the top of the class. The source codes for the three blocks we want to implement look as follows.
import * as React from "react";
import * as Tripetto from "tripetto-collector";
import { Checkbox } from "tripetto-block-checkbox/collector";
import { IBlock } from "../helper";

@Tripetto.block({
  type: "node",
  identifier: "tripetto-block-checkbox"
})
export class CheckboxBlock extends Checkbox implements IBlock {
  render(): React.ReactNode {
    return (
      <label>
        <input
          key={this.key()}
          type="checkbox"
          defaultChecked={this.checkboxSlot.value}
          onChange={(e: React.ChangeEvent<HTMLInputElement>) => {
            this.checkboxSlot.value = e.target.checked;
          }}
        />
        {this.node.name}
      </label>
    );
  }
}
import * as React from "react";
import * as Tripetto from "tripetto-collector";
import { Dropdown, IDropdownOption } from "tripetto-block-dropdown/collector";
import { IBlock } from "../helper";
@Tripetto.block({
type: "node",
identifier: "tripetto-block-dropdown"
})
export class DropdownBlock extends Dropdown implements IBlock {
render(): React.ReactNode {
return (
<div>
<label>
{this.node.name || "..."}
{this.required && <span>*</span>}
</label>
{this.node.description && <p>{this.node.description}</p>}
<select
key={this.key()}
defaultValue={this.value}
onChange={(e: React.ChangeEvent<HTMLSelectElement>) => {
this.value = e.target.value;
}}
>
{this.node.placeholder && (
<option value="">{this.node.placeholder}</option>
)}
{this.props.options.map(
(option: IDropdownOption) =>
option.name && (
<option key={option.id} value={option.id}>
{option.name}
</option>
)
)}
</select>
</div>
);
}
}import * as React from "react";
import * as Tripetto from "tripetto-collector";
import { Text } from "tripetto-block-text/collector";
import { IBlock } from "../helper";
@Tripetto.block({
type: "node",
identifier: "tripetto-block-text"
})
export class TextBlock extends Text implements IBlock {
render(): React.ReactNode {
return (
<div>
<label>
{this.node.name || "..."}
{this.required && <span>*</span>}
</label>
{this.node.description && <p>{this.node.description}</p>}
<input
key={this.key()}
type="text"
required={this.required}
defaultValue={this.textSlot.value}
placeholder={this.node.placeholder}
maxLength={this.maxLength}
onChange={(e: React.ChangeEvent<HTMLInputElement>) => {
this.textSlot.value = e.target.value;
}}
/>
</div>
);
}
}Part D — Firing things up
We are almost done. Follow these final steps to get airborne.
🚧 Warning: Deprecated SDK code snippets and packages
Please note that the below code snippets and used packages are about a deprecated version of the Tripetto SDK. In the meantime the SDK has evolved heavingly. For up-to-date SDK documentation, please have a look at the following links:
1. Import your blocks in your app.tsx to make sure the blocks are registered:
import "./blocks/checkbox";
import "./blocks/dropdown";
import "./blocks/text";
2. Add some code to load a form definition and feed it to the collector. Open your app.tsx and replace the code with:
import * as React from "react";
import * as ReactDOM from "react-dom";
import * as Superagent from "superagent";
import { Collector } from "./component";
import "./blocks/checkbox";
import "./blocks/dropdown";
import "./blocks/text";

// Fetch our form and render the collector component.
Superagent.get("form.json").end((error: {}, response: Superagent.Response) => {
  if (response.ok) {
    ReactDOM.render(
      <Collector definition={response.text} />,
      document.getElementById("app")
    );
  } else {
    alert("Bummer! Cannot load form definition. Does the file exists?");
  }
});
We use superagent here to fetch the form definition stored in ./static/form.json and feed it to the collector component.
3. Install the Tripetto editor using npm (detailed instructions here) to create a form definition:
npm install tripetto -gThis command installs the editor globally and allows you to start it from your command line just by entering tripetto. And it allows you to start creating a form by executing the following command from your project folder (make sure you execute this command from the root ./ of your project folder):
tripetto ./static/form.jsonThis will start the editor at http://localhost:3333 so you can create your form with it. When you’re done, hit the Save button to store the form definition. Verify that the file ./static/form.json is present.
4. Start your collector by executing npm test. Open http://localhost:9000 in your browser. You should then see the form running.
Part E — Processing collected data
Now that your form is running properly, you probably want to do something with data you collect through it. That's where our onFinish prop comes into play.
🚧 Warning: Deprecated SDK code snippets and packages
Please note that the below code snippets and used packages are about a deprecated version of the Tripetto SDK. In the meantime the SDK has evolved heavingly. For up-to-date SDK documentation, please have a look at the following links:
Open app.tsx and add the prop as shown below. This will output the collected data to your console when the form is completed. We use the export API for this job.
<Collector
  definition={response.text}
  onFinish={(instance: Tripetto.Instance) =>
    console.dir(Tripetto.Export.fields(instance))}
/>
Don't forget to import the required symbols. In this case:
import * as Tripetto from "tripetto-collector";Browse the full example
What else?
This tutorial is just a basic example of what you can do with Tripetto. It shows you how to implement a collector and some simple building blocks. But Tripetto can do more than that. For example, you can write your own conditional blocks that allow Tripetto to branch on certain conditions — making ever smarter forms. Dive into our documentation to learn more!
Documentation
You can find all Tripetto docs here. The detailed collector documentation can be found here. If you want to develop your own building blocks, have a look around here.
Other examples
We also have examples for React with Material UI, Angular, Angular Material and more: